BadgeOS
This manual is for BadgeOS 2.1.0 on NixOS 26.05.20261031.fa13731. Want to skip the build? Grab an SD card image for your badge or LicheeRV Nano.
BadgeOS is NixOS for the Nix Vegas DEF CON badge, and for the Sipeed LicheeRV Nano. The badge is a small single board computer built around a Milk-V Duo Module 01, whose Sophgo SG2000 has two very different CPUs in it, an ARM Cortex-A53 and a RISC-V C906. The SD card has a complete NixOS install for each of them, and you pick which one boots (see Switching CPU cores). The Nano’s SG2002 has the same two cores, and a strap resistor on the board picks one (see The LicheeRV Nano).
Everything on the badge comes from one repository and is built with Nix, including the kernel, the bootloader, the system for each core, and even the LED patterns and OLED screens, which are small Nix functions that the badge evaluates every frame.
Where to start
If you just got a badge, Getting started walks through booting it, logging in, and getting it on a network, and Profiles and buttons covers the desktop and the video player.
If you want to change what the LEDs and the OLED show, LED ring and OLED screens explains how the patterns and screens work and how to write your own on the badge itself.
If you want to keep running BadgeOS without the SD card, Installing to the eMMC moves it onto the badge’s own storage, and Updating covers keeping it current afterwards.
If you’re working on other SG200x hardware, How BadgeOS boots describes the storage layout and the boot chain, and Using the NixOS module shows how to use BadgeOS as a board support package in your own flake. The SoM covers the SG2000 itself, what doesn’t work yet, and JTAG, and Contributing covers working on BadgeOS itself.
If something isn’t working, try Troubleshooting, and Security covers the default login and what the badge exposes.
The options reference lists every option we declare, and there’s a search page for it too.
Note
Working on BadgeOS with an LLM? Go for it. See Using LLMs on BadgeOS before you send a pull request.
The hardware
This is the short version; The hardware has the connectors, the pinouts and what the silkscreen labels mean.
| Part | What BadgeOS does with it |
|---|---|
| SG2000: ARM Cortex-A53 and RISC-V C906 | Boots either one (switching cores) |
| 24 WS2812 LEDs on SPI3 | Runs Nix patterns on them from early boot |
| SAO connector, I2C OLED (SSD1306 or SH1106) | Status screens and effects, also written in Nix |
| Sharp Memory Display header | The text console (tty1) |
| HDMI out, through an LT8912B MIPI-DSI bridge | Desktop and video profiles, with HDMI audio |
| AIC8800 WiFi and Bluetooth | NetworkManager and BlueZ |
| 10/100 Ethernet | The badge’s own network, routed out over WiFi, with netboot |
| USB-C | A USB network link to your computer on the same network, or a USB host port in the desktop profile |
| eMMC | An optional install target with A/B updates |
| BOOT, RESET and BUTTON | BOOT and BUTTON pick a profile at power-up, and BUTTON also drives the LEDs and screens |
| AA battery pack, voltage-sense ADCs | nix-badge power shows the rails and the battery |
The AA batteries are there because we accidentally ordered a lot of them for last year’s badge, and this one needed to use them somehow.
Source
BadgeOS lives at github.com/NixVegas/BadgeOS under the LGPL-3.0. The bootloader builds and our SG2000 mask ROM research are in NixVegas/sophgone, and the PCB is on git.nixos.lv since it doesn’t fit on GitHub anymore. Last year’s ESP32-C6 badge has its own README.
Getting started
Download the SD card image
We build SD card images for every release on our Hydra,
so you don’t have to compile anything. The current release lives on the v2.1 branch:
| Board | Image |
|---|---|
| The badge | sdcard.img (job) |
| LicheeRV Nano, both cores | sdcard.img (job) |
| LicheeRV Nano, RISC-V only | sdcard.img (job) |
| LicheeRV Nano, ARM only | sdcard.img (job) |
Each link grabs the newest image that finished building. The v2.1
jobset has everything else we build for the
release, and the master jobset has the
bleeding edge. Flash it the same way as one you built yourself, below.
Build and flash the SD card image
If you’d rather build it yourself, the image is the flake’s default package, and it
cross-compiles from an x86_64-linux or aarch64-linux machine. Point Nix at our cache
and most of it downloads instead. You’ll need to be a trusted user for the --options,
and the key is the same one as in The badge’s cache:
$ nix build github:NixVegas/BadgeOS/v2.1#sg2k-sdcard \
    --option extra-substituters https://cache.nixos.lv \
    --option extra-trusted-public-keys citadel.build.dc.nixos.lv-1:UZbkvFcWZr/VP7cvNPLRpcMTCvaYw7X5XQDzA+nPVxY=
$ ls -l result/sdcard.img
The image is about 6.8 GiB, so you’ll want a card of 8 GB or more. Write it to the
whole card rather than a partition, and double check the device name with lsblk first,
since everything on it will be overwritten:
$ sudo dd if=result/sdcard.img of=/dev/sdX bs=4M conv=fsync status=progress
For a Sipeed LicheeRV Nano, build licheerv-nano-sdcard instead, which has a system for
each of its cores, or licheerv-nano-sdcard-riscv or licheerv-nano-sdcard-arm for just one. A
strap resistor on the Nano picks its core, and it ships set for RISC-V (see
The LicheeRV Nano). The rest of this page is about the badge.
First boot
Put the card in and power the badge on. You don’t need to hold any buttons, which gets you
the default profile. The first boot does a bit of one-time setup: the
USERDATA partition grows to fill the card and gets a 512 MiB swap file, /etc/nix-badge
is filled with the default LED patterns and OLED screens, and the hostname
becomes nix-badge, or nix-badge-07 for serial SG1-0007 once the serial number is
fused (see Installing to the eMMC).
The LED ring starts animating early in boot. ARM is the default core and the faster of the two, and on RISC-V everything comes up noticeably later, especially the desktop (see Switching CPU cores).
When the badge boots from an SD card, the login shell will remind you that it can be installed to the eMMC. You don’t have to do this, and BadgeOS runs fine from the card.
Log in
There are two local consoles, the serial console at 115200 8N1, and the Sharp Memory
Display on the front header if you have one fitted, which shows the kernel messages and a
login prompt on tty1.
Log in as badge, which has passwordless sudo. The initial passwords for badge and
root come from initialPassword in
modules/sg2k/common.nix,
so change yours with passwd after logging in for the first time. root can only log in
on a console. The login prompt also shows the badge’s IPv4 addresses on eth0 and
wlan0.
Add an SSH key
SSH only accepts keys, so add yours from a console:
$ mkdir -p ~/.ssh && chmod 700 ~/.ssh
$ cat >> ~/.ssh/authorized_keys
(paste the contents of your id_ed25519.pub, then press Ctrl-D)
$ chmod 600 ~/.ssh/authorized_keys
Your home directory is on USERDATA, so the key survives reboots and updates, though a
factory reset will remove it.
WiFi
WiFi is managed by NetworkManager. You can connect with nmcli, and --ask makes it
prompt for the password so it doesn’t end up in your shell history:
$ nmcli device wifi list
$ nmcli --ask device wifi connect "Your SSID"
nmtui does the same thing in a text UI. Saved networks are kept on USERDATA, so the
badge reconnects after a reboot.
Tip
On a WPA3 (SAE) network, a profile made with
nmtuican refuse to associate because it set802-11-wireless-security.auth-algtoopen. You can clear it withnmcli connection modify "Your SSID" 802-11-wireless-security.auth-alg "".
Bluetooth is powered on at boot, and you can pair things with bluetoothctl.
Ethernet
In the default profile, the Ethernet port is part of the badge’s own network: the badge
hands out addresses to whatever you plug in and routes it out over WiFi (see Router and
netboot). In the desktop profile it’s a plain network port, and NetworkManager
does DHCP on eth0.
USB networking
In the default profile, the USB-C port is a USB device, so if you plug it into your computer the badge shows up as a USB network adapter (CDC-NCM). The badge serves DHCP and DNS on that link:
| Address | |
|---|---|
| Badge | 10.55.0.1/24 |
| Your computer | from 10.55.0.100 to 10.55.0.200 |
Once your key is on the badge, you can log in over it:
$ ssh badge@10.55.0.1
The USB link is part of the badge’s own network, along with the Ethernet port. While the
badge’s WiFi is connected, it offers itself as your computer’s gateway, so your computer
reaches the internet through the badge; until then, your computer keeps using its own
uplink (see Router and netboot). The addresses are set by the
badge.lan options.
The desktop profile turns the port into a USB host for a keyboard and mouse instead, so the USB link isn’t there, and you’ll need Ethernet or WiFi to reach the badge.
Finding the badge on the network
The console login prompt shows the eth0 and wlan0 addresses. If you have an OLED
attached, the net screen shows them too (long-press BUTTON to get to it), and from a shell
you can always run ip -brief address.
Next steps
Next, see Profiles and buttons for the desktop, the video player and the factory reset, LED ring and OLED screens to change what the badge shows, and Installing to the eMMC to run BadgeOS without the SD card.
The hardware
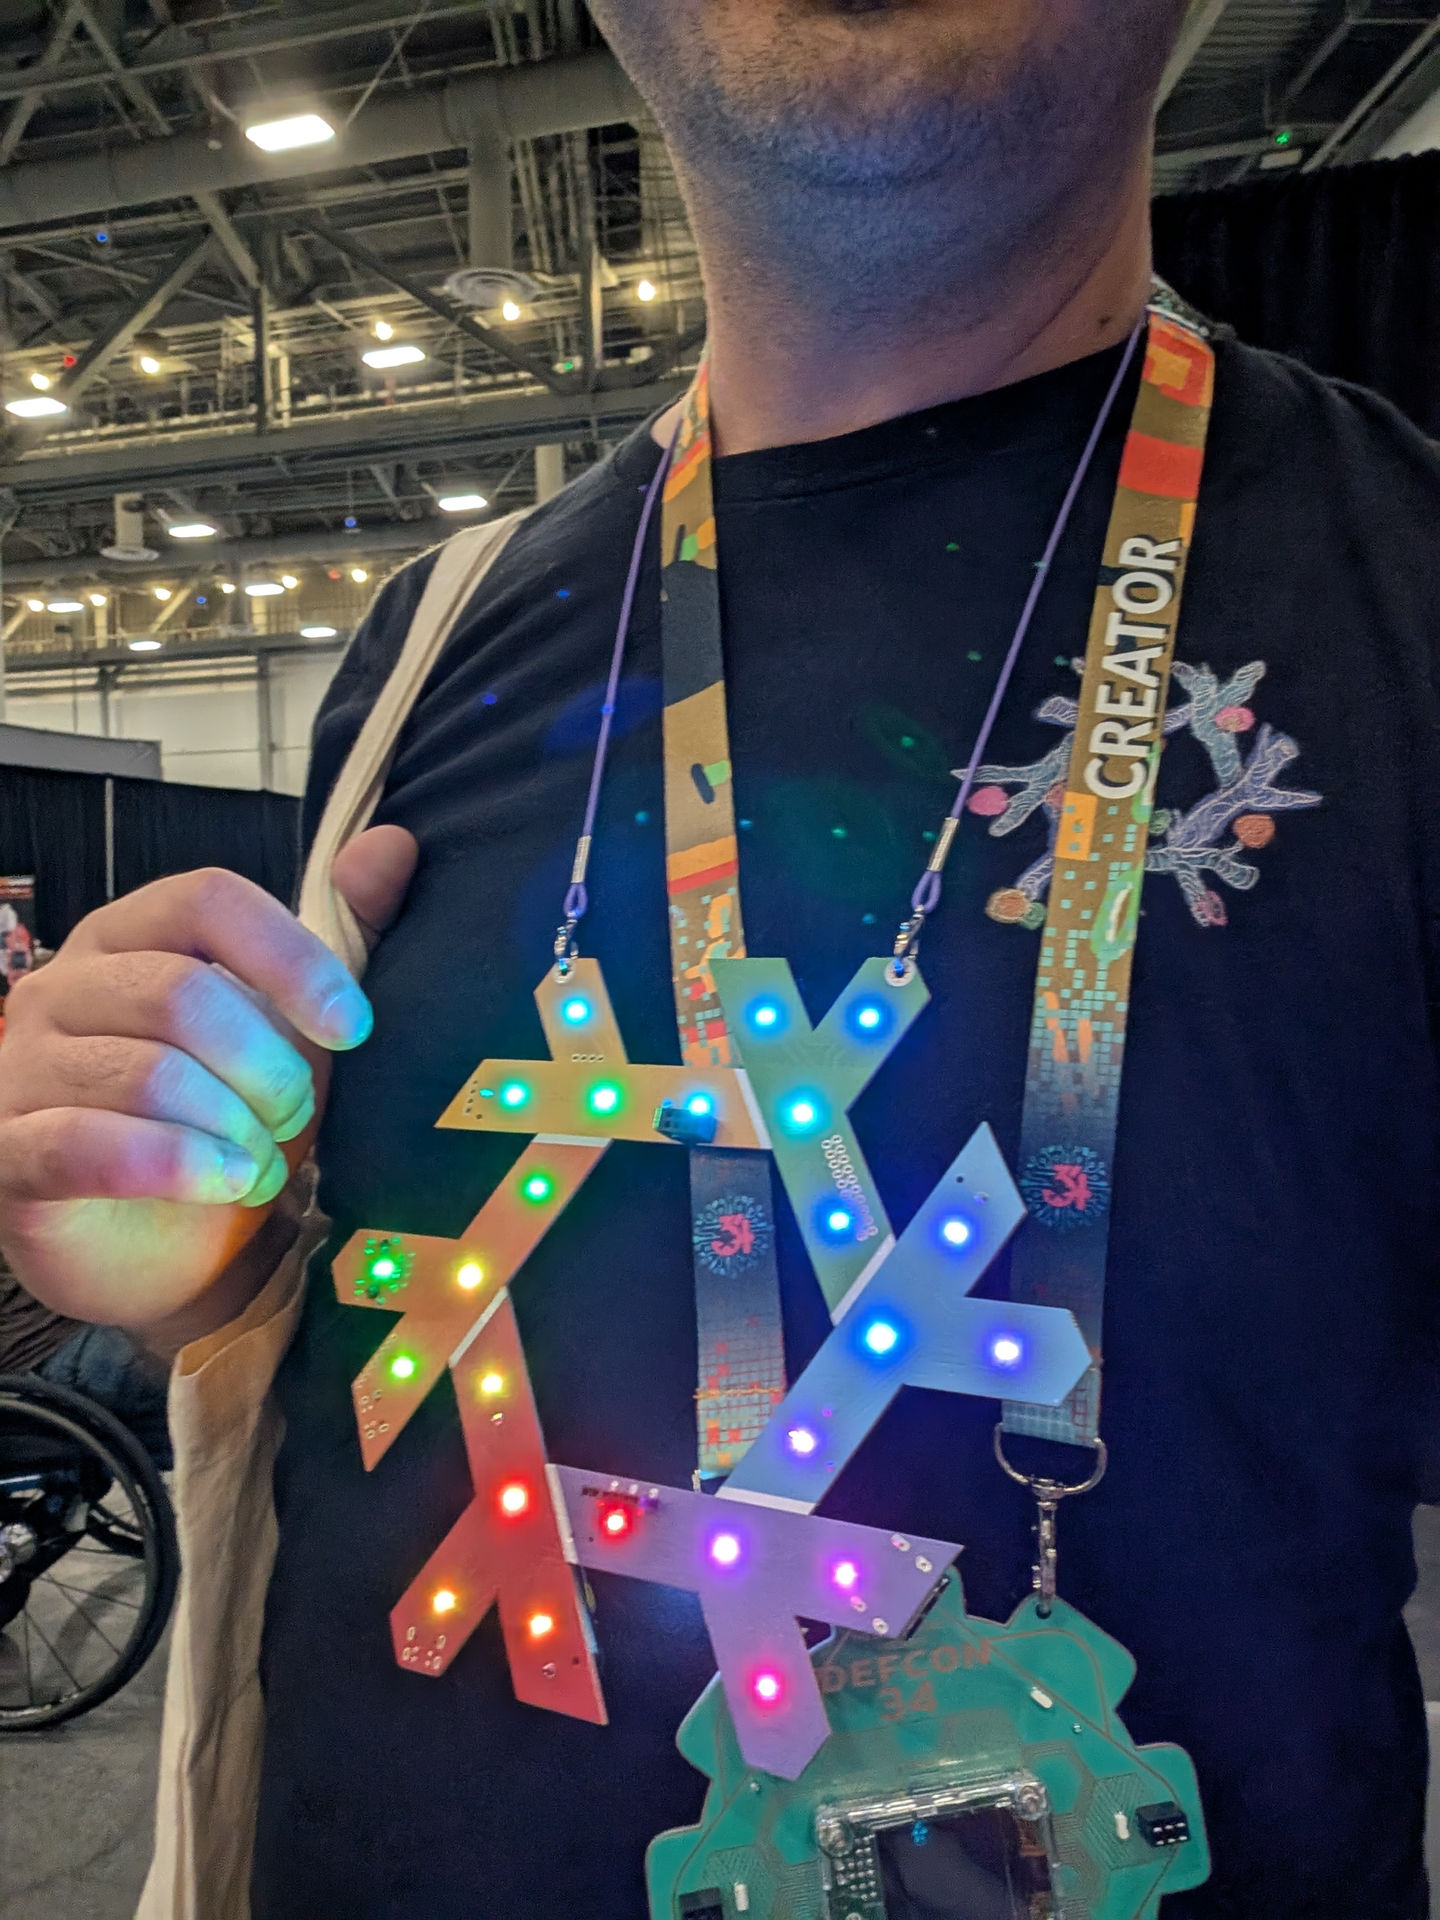
The reference designators (J6, S3 and so on) come from the KiCad
project, and everything here matches the v2.0 board
that was fabricated (commit 07f6efc; later commits only touch the silkscreen and the
README).
What the labels mean
| Silkscreen | Part | What it is |
|---|---|---|
| LUSTRATE | SW2 | The power switch for the batteries. Plugging in USB powers the badge without it. |
builtins.currentSystem | SW1 | The core switch: ARM, RISC-V, or AUTO (see Switching CPU cores) |
| BOOT | S1 | Picks the desktop profile at power-up; it’s also the mask ROM’s recovery strap |
| BUTTON | S3 | The general purpose button, which picks the video profile at power-up and drives the LEDs and screens afterwards. The software calls it USER. |
| RESET | S2 | Resets the module |
| DEBUG | J1 | USB-C to the on-board CH347, which gives you the serial console (115200 8N1) and JTAG, and powers the badge |
| USB | J9 | The module’s own USB-C port, a USB network adapter by default or a USB host in the desktop profile |
| ETH | J3 | 10/100 Ethernet, from the SoC’s built-in PHY |
| SD | J4 | The microSD slot |
| HDMI | HDMI1 | HDMI out, through the LT8912B MIPI-DSI bridge |
| SAO | SAO1 | The SAO connector (see below) |
| OLED | J7 | A 4-pin I2C header for an SSD1306 or SH1106 OLED |
| PWR | D5 (red) | Power-good from the 3.3 V regulator |
| ACT | D8 (green) | Activity on the CH347 |
| STAT | D3 (white) | A status LED driven by the SoC |
There are also a few headers without a label on the silkscreen: J6, the big 2x10 header; J5, the front header for the Sharp Memory Display; J8, a second OLED header wired the same way as J7; and J2, a small 2 mm header on the JTAG and console lines.
The silkscreen has a few power notes too. HDMI only gets its 5 V when the badge is on USB power, so it won’t work on batteries alone. USB host mode on the USB port needs power coming in through the DEBUG port. The HDMI link has the details of the HDMI output.
The 2x10 header (J6)
J6 is a 2.54 mm 2x10 header on the back of the badge, and it’s the main place to hang your own hardware off the badge. Odd pins are on one row and even pins on the other:
| Pin | Signal | Pin | Signal | |
|---|---|---|---|---|
| 1 | VSEL | 2 | +3.3 V | |
| 3 | LCD_RST (also BUTTON) | 4 | SPI3_CS | |
| 5 | LCD_PWR_CT | 6 | SPI3_SDI | |
| 7 | LCD_PWM | 8 | SPI3_SDO | |
| 9 | PWM0_BUCK | 10 | SPI3_SCK | |
| 11 | SAO_GPIO2 | 12 | I2C1 SCL | |
| 13 | +1.8 V | 14 | I2C1 SDA | |
| 15 | +1.8 V | 16 | GND | |
| 17 | ADC3 | 18 | GND | |
| 19 | GND | 20 | GND |
A few things to know about these pins:
- VSEL is whatever is powering the badge at the moment, so it’s about 5 V on USB power and the battery pack’s voltage on batteries. The +1.8 V pins come from the same regulator as the HDMI bridge, so don’t load them much while HDMI is running.
- SPI3 is the same bus that drives the LED ring. The ring gets SPI3_SDO through an AND
gate (U10) with SPI3_CS, so it only listens while CS is high, and every time CS goes
low for another device the ring sees it as the end of a frame. A device on SPI3 has to
share the bus with
nix-badge-bling, which owns/dev/spidev3.0. - I2C1 is the bus the OLED headers use (
/dev/i2c-1), on the module’s side of the SAO’s bus switch, so anything you put here shows up next to the OLED. - LCD_RST is the module’s LCD_RST pin, which is
PWR_GPIO2in the SoC’s always-on RTC domain. BUTTON is wired to it through a 100 Ω resistor, with a 10 kΩ pull-up to 1.8 V, so it reads low while BUTTON is pressed. It’s a 1.8 V-only pad, so never drive it above 1.8 V. - LCD_PWR_CT and LCD_PWM are the module’s pins 37 and 38, and are otherwise unused on the badge.
- PWM0_BUCK and SAO_GPIO2 are GPIO lines 0 and 19 on the SoC’s second GPIO controller,
named
pwm0-buckandsao-gpio2in the device tree. - ADC3 goes straight to a SARADC input with no divider, and Linux reads it as IIO
channel 2 (
in_voltage2_rawtimesin_voltage_scalegives millivolts). The other two channels measure VSEL and the battery through dividers.
The SAO connector
The SAO connector follows the newest SAO spec, v1.69bis (also called SAOv2, see badge.life). It’s mounted upside down, the same way as on this year’s official DEF CON badge, so an add-on hangs the other way up from what you’d expect. Check where pin 1 is before you plug one in.
| Pin | Signal |
|---|---|
| 1 | 3.3 V, switched and current-limited (U13) |
| 2 | GND |
| 3 | I2C1 SDA |
| 4 | I2C1 SCL |
| 5 | GPIO1: the LED ring’s data out |
| 6 | GPIO2: sao-gpio2 |
The connector’s power and signals go through a load switch (U13) and a bus switch (U12),
which BadgeOS turns on at boot. GPIO1 is the end of the LED ring’s WS2812 chain,
buffered, so an add-on with its own WS2812s can sit at the end of the chain. Raise the LED
count in badge.bling to drive them.
The other headers
J5, the front header for a Sharp Memory
Display, is a 1x6 2.54 mm header on SPI3. The
display shows up as the text console on tty1.
| Pin | Signal |
|---|---|
| 1 | VSEL |
| 2 | Not connected |
| 3 | GND |
| 4 | SPI3_SCK |
| 5 | SPI3_SDO |
| 6 | CS, which is SPI3_CS inverted (Q7) because the display’s chip select is active high |
J7 (labelled OLED) and J8 are 1x4 2.54 mm headers for an I2C OLED, in the usual pin order for the cheap SSD1306 modules:
| Pin | Signal |
|---|---|
| 1 | GND |
| 2 | VSEL |
| 3 | I2C1 SCL |
| 4 | I2C1 SDA |
J2 is a 1x8 2 mm header on the 3.3 V lines between the CH347 and the module. The JTAG lines have 33 Ω resistors between the CH347 and the module, and J2 sits on the CH347’s side of them.
| Pin | Signal |
|---|---|
| 1 | GND |
| 2 | TCK |
| 3 | TDO |
| 4 | TDI |
| 5 | TMS |
| 6 | TRST |
| 7 | UART0 TX (the console) |
| 8 | UART0 RX |
Power and the LED ring
The badge runs on three AA cells in series (BT1 to BT3) or on USB, with USB taking priority when it’s plugged in. A TPS63020 buck-boost makes the 3.3 V rail from that, and an RT9080 makes 1.8 V for the HDMI bridge. The RTC and the core-select latch stay powered from a tap after the first two cells (or from 3.3 V when that’s up, which is what “VRTC 2xAA/3v3” on the silkscreen means), with a supercapacitor to keep the RTC alive while you swap batteries.
The 24 WS2812 LEDs in the ring (LED1 to LED24) run from VSEL rather than the 3.3 V rail, on purpose. When the batteries get low, the ring turns into red glitch art, which we thought was more interesting than having it just dim out.
The HDMI link
The SG2000 has no HDMI output of its own. The badge makes one from the SoC’s MIPI-DSI output with a Lontium LT8912B bridge (U16): the display engine (DISP) scans out a frame, the DSI controller and D-PHY send it over two lanes, and the bridge turns that into HDMI on HDMI1. Everything runs at 1280x720p60 RGB888.
Getting a stable picture out of that chain took a long time. This page is what we learned, so you don’t have to learn it again.
What drives it
Which software owns the link depends on the profile (see Profiles and buttons):
| Profile | DISP and DSI | The bridge |
|---|---|---|
desktop | soph_drm, the KMS driver Sway runs on | mainline lontium_lt8912b |
video | the vendor VDEC to VO path | nix-badge-video, over I2C; lontium_lt8912b is blacklisted |
default | nothing | nothing: its device tree node is disabled |
The bridge’s node is disabled outside the desktop profile because, with no DSI host to attach to, the mainline driver defers its probe forever. Every retry asks for the bridge’s seven supplies again and logs each one, and the badge eventually ran out of memory under the load.
In the desktop profile, soph_drm offers two modes, and both put a 1280x720p60 line
on the wire. At 1280x720 the video layer scans the compositor’s buffer 1:1. At 640x360
the GOP overlay draws it and its own 2x scaler doubles it. The lontium_lt8912b patch
adds force_720p, so the bridge is always programmed for the 720p line whatever mode
the compositor picked.
Power
HDMI only gets its 5 V when the badge is on USB power, so it doesn’t work on batteries alone.
The bridge has no hardware reset. Its RESET_N pin is only an RC circuit, and its 1.8 V
rail is always on, so a bridge that stops responding stays that way through a warm
reboot. If HDMI is black after systemctl reboot and was fine before, power-cycle the
badge.
The bus
The bridge’s control ports are on the SoC’s i2c-2 at 0x48, 0x49, 0x4a (audio) and
0x4b. The connector’s DDC lines reach the same bus through two level shifters, so the
monitor’s EDID EEPROM shows up there too, at 0x50:
$ sudo i2cdetect -y -r 2
$ sudo i2ctransfer -f -y 2 w1@0x50 0x00 r128@0x50
The second command reads the first 128 bytes of the monitor’s EDID, which start with
0x00 0xff 0xff 0xff 0xff 0xff 0xff 0x00.
If you run the vendor’s Linux 5.10 image instead, its soph_mipi_tx driver switches
the IIC2 pads to GPIO, and the bridge then never answers on i2c-2. Mainline leaves
the pad mux alone.
What it took
Each of these looked like a different fault, and each one is now handled in BadgeOS. They’re listed by what you’d see on the monitor, in case you’re bringing up the link some other way.
A locked 720p signal, but black
The monitor says it has 1280x720 at 60 Hz, and the picture is a perfectly even black.
That’s the sync polarity: the DISP and the bridge disagree about it, so the bridge
reads the blanking interval as the picture. The polarity is bits 5 and 6 (VS_POL and
HS_POL) of DISP_CFG at 0x0A088000, and which way they need to point depends on how
the bridge was programmed. Check this first whenever the signal locks and nothing
shows.
Four lanes show nothing
With all four DSI lanes, the lanes wouldn’t sync together and the monitor showed nothing. Two lanes have room for 720p60 RGB888, so both paths use two.
The picture leans
If every row is shifted about one pixel from the row above, the bridge’s active width
is off by one. The badge programs 1281 instead of 1280 through the patched driver’s
hactive_offset parameter, set by
hardware.sg2k.hdmi.hactiveOffset.
You can change it live in /sys/module/lontium_lt8912b/parameters/hactive_offset.
Flashing
The DISPPLL is a spread-spectrum synthesizer, and left alone its frequency wanders
enough that the bridge’s clock recovery loses lock now and then. The video path pins
its divider before the D-PHY comes up (the disppll_fix_div parameter of the patched
cv181x_mipi_tx); pinning it later doesn’t help, because the bridge doesn’t lock again
on its own.
Streaks, a stretched picture, or “Not supported”
The badge’s HDMI connector isn’t exactly impedance matched, so it needs more TMDS
drive than the bridge’s defaults give it. With upstream’s values (0xb1, 0xb1 and 0x0e
in registers 0x31 to 0x33 of the bridge at 0x48) a direct connection streaks, shows a
stretched picture, and can come back as “unsupported” after a replug. BadgeOS writes
0xa1, 0xa1 and 0x03 instead, in both the patched lontium_lt8912b and the video
path. These values came from trying, not from a datasheet, and they hold for every
badge, since the cause is the board.
Slips and blanks that depend on what’s on screen
With the drive fixed, some content still upset the link: a run of near-white pixels
right next to near-black ones made the picture slip from that row down, or blanked
the monitor. It depends on what came earlier on the line, which points at the
analog link rather than at DSI. Sending limited-range RGB (16 to 235) instead of full
range makes it go away. soph_drm programs the DISP’s output colour conversion that
way every time it turns the output on; its rgb_limited parameter turns it off.
Audio
Sound goes to the monitor over HDMI: the SoC’s I2S output feeds the bridge’s audio
port at 0x4a, and the bridge has to be in HDMI mode, not DVI. Turn it on with
hardware.sg2k.hdmi.audio.
The I2S controller runs from a fixed 24.576 MHz clock, which is what 48 kHz needs.
Checking it
With a picture on screen, these are the values to compare against:
| Where | Value |
|---|---|
DISP_CFG (0x0A088000) | 0x00049080 |
| DSI controller mode (0x0A08A000) | 0x00000004, and it stays set |
| bridge 0x49, register 0x04 | 0x3e (RGB888 input) |
The bridge’s registers read over I2C (i2cget -f -y 2 0x49 0x04). The DISP and DSI
registers belong to the display drivers, so BadgeOS’s kernel, which is built with
STRICT_DEVMEM, won’t let nix-badge mmio read them; you need a kernel
without it.
Capture cards aren’t a good test. Some refuse the badge’s exact timing with an “unsupported resolution” message even when a monitor shows a clean picture, so check with a monitor before deciding the badge is at fault.
The SoM
The badge is built around a Milk-V Duo Module 01, a small castellated module with a Sophgo SG2000, an AIC8800 for WiFi and Bluetooth, and eMMC on it. Milk-V publishes the module’s hardware files in milkv-duo/duo-files.
The SG2000
The SG2000 has more cores in it than you’d expect:
- an ARM Cortex-A53 and a RISC-V C906, both at 1 GHz, of which one runs Linux depending on the core switch
- a second, smaller C906 at 700 MHz that can run alongside either of them
- an 8051 microcontroller
- 512 MB of DRAM in the same package
- a 0.5 TOPS (INT8) TPU, and H.264/H.265 encode and decode (the video profile uses the H.264 decoder)
Sophgo’s documentation for it is in sophgo/sophgo-doc, including the technical reference manual (the v1.02 TRM is the newest we know of). Sophgo tracks its mainline kernel work on the sophgo/linux wiki, and the vendor display and video drivers that BadgeOS’s HDMI support and video player are ported from are in sophgo/osdrv and sophgo/cvi_mpi. Our own notes on the boot ROM are in sophgone.
Limitations
There’s still plenty left to do on this chip:
- Battery life is short. You’ll get a few hours out of a set of AAs at best, because Linux isn’t using any of the SoC’s low-power modes yet.
- The little C906 isn’t used yet. We want to try running the LED ring’s SPI on it, and to get Linux into the lower-power modes.
- The MIPI camera input isn’t wired up on the badge. The MIPI display output (DSI) is, and goes to the HDMI bridge.
- The TPU isn’t up under BadgeOS. It works under Milk-V’s Debian image, but its drivers still need to be forward-ported to the mainline kernel.
- The RISC-V core is noticeably slower than the ARM one (see Switching CPU cores).
JTAG
The two big cores are debugged in different ways, and both go through the CH347 behind
the DEBUG port. BadgeOS packages OpenOCD with the CH347 driver as openocd-ch347 (the
OpenOCD in nixpkgs is too old to have it), along with configs for the badge, so you can run
it on the computer the DEBUG port is plugged into:
$ nix run github:NixVegas/BadgeOS#openocd-ch347 -- -f badge/c906.cfg
The configs live in
pkgs/v2/by-name/openocd-ch347/scripts.
Starting OpenOCD reconfigures the CH347, which kills its serial console until you reset
the USB device (nix shell nixpkgs#usbutils -c usbreset 1a86:55dd), so it’s best not to
rely on the console while you’re debugging.
RISC-V
The C906’s JTAG is the ordinary four-wire kind (TCK, TMS, TDI, TDO and TRST), and the
badge wires it to the CH347, so the DEBUG port is all you need. It only answers while the
badge is booted on the RISC-V core. Use badge/c906.cfg. Examining the core can be flaky,
so if init fails, try again or lower the adapter speed. Memory access while Linux is
running is fiddly, since the MMU is on.
ARM
The A53 uses the SG2000’s two-wire debug mode, which is ARM’s SWD (a standard SW-DP, not cJTAG). Its two pins are the MIPI_TX_1 pair, which the badge uses for DSI lane 1 to the HDMI bridge, so they aren’t wired to the CH347 and you’ll need to add two wires:
- On the running ARM system, switch the pads over to the debug port. The pin controller
owns these registers, so this needs a boot with
iomem=relaxedadded to the kernel command line by hand:
This lasts across a warm reset but not a power cycle, and takes that DSI lane away from the HDMI bridge while it’s set.$ sudo nix-badge mmio write 0x030011AC 0 $ sudo nix-badge mmio write 0x030011B0 0 - Wire MIPI_TX_1N to the CH347’s TMS (SWDIO), MIPI_TX_1P to its TCK (SWCLK), and connect ground. J2’s TMS (pin 5) and TCK (pin 2) are the CH347’s side of those lines (see The hardware).
Then use badge/a53.cfg. Besides the core itself, it sets up a53.axi, which reads and
writes physical memory without halting the core. The first connection after power-up
sometimes fails to read the debug port’s IDR, and running it again works.
Resetting a hung badge
When the console is dead but the chip is still powered, the SG2000’s watchdog can reset
it, as long as the SWD wiring and pad mux above were set up before the badge hung.
badge/wdt-reset.cfg reads the watchdog and RTC_EN_WDT_RST_REQ, the register that turns
its request into a chip reset (it has to read 1), and with FIRE set it arms the watchdog
for an immediate reset:
$ nix run github:NixVegas/BadgeOS#openocd-ch347 -- -f badge/wdt-reset.cfg
$ nix run github:NixVegas/BadgeOS#openocd-ch347 -- -c "set FIRE 1" -f badge/wdt-reset.cfg
Profiles and buttons
Every BadgeOS generation has three boot profiles, and U-Boot picks one based on the buttons you hold at power-up.
| Hold at power-up | Profile | What you get |
|---|---|---|
| nothing | default | LED ring, OLED screens, router and netboot |
| BOOT (S1) | desktop | Sway on HDMI with games and a demo; the USB port is a host |
| BUTTON (S3) | video | A full-screen H.264 clip player on HDMI |
| BOOT and BUTTON | default, after a factory reset | A fresh USERDATA partition |
Hold the button while you switch the badge on, and keep holding it until the status LED stops blinking, since U-Boot reads the buttons at the end of its short countdown. (The verified-boot U-Boot has no countdown and reads them right away.) The buttons only pick a profile at power-up. Once Linux is running, BUTTON drives the LEDs and screens, and holding BOOT for 3 seconds switches cores.
All three profiles are part of the same generation and share USERDATA, so your files,
keys and WiFi networks are there in all of them.
default
This is the everyday profile. The LED ring animates from early boot, and the optional OLED shows status screens and effects (see LED ring and OLED screens). The USB-C port is a USB device that gives your computer a network link to the badge, and with the Ethernet port it makes up the badge’s own routed network. BUTTON changes the LED pattern with a short press, the OLED screen with a long press, and the evaluator if you hold it for 5 seconds.
desktop
This runs Sway on the HDMI output at 1280x720, logged in as badge. The SG2000 has no 3D
GPU, so the compositor draws with pixman and OpenGL programs run on llvmpipe on the CPU.
The USB-C port becomes a USB host for a keyboard, mouse or hub, and the OLED engine is
turned off.
The desktop comes with:
badge-demo, “Nix Fixes This”, a 640x360 CPU-rendered demoscene production with a chiptune (Esc quits)badge-quake3, ioquake3 with the Quake III demo data, tuned for llvmpipe at 640x360badge-doom, crispy-doom with the Freedoom WADs- the
footterminal
With a keyboard attached:
| Keys | Action |
|---|---|
| Super+Return | Open a terminal |
| Super+Shift+Q | Close the focused window |
| Super+Shift+E | Exit Sway |
| Super+Shift+M | Put the output back in the desktop mode |
The games switch the output to a 640x360 mode, which has a quarter of the pixels to draw, and put it back when they exit. Sound goes to the monitor over HDMI.
The desktop is configured by the badge.graphics options,
and badge.desktop.enable controls whether the profile gets
built at all.
video
This is a clip player for HDMI that uses the SG2000’s hardware H.264 decoder and its video
output path directly, without a compositor. It plays every *.264 or *.h264 file in
/var/lib/nix-badge-video in name order. A short press of BUTTON skips to the next clip,
and a press of 600 ms or longer goes back to the previous one.
The clips have to be raw H.264 Annex-B streams without audio. You can convert a video on your computer with ffmpeg and copy it over from any profile, then boot into the video profile:
$ ffmpeg -i in.mp4 -an -c:v libx264 -bsf:v h264_mp4toannexb -f h264 clip.264
$ scp clip.264 badge@10.55.0.1:
$ ssh badge@10.55.0.1 'sudo mkdir -p /var/lib/nix-badge-video && sudo mv clip.264 /var/lib/nix-badge-video/'
The player owns BUTTON in this profile, so the OLED engine is off. The
badge.video options set the folder, the frame rate and the
long-press time.
Factory reset
Holding BOOT and BUTTON together at power-up boots the default profile with a request to
reset, and USERDATA is reformatted before anything mounts it. That removes everything
you’ve changed, including your home directory and SSH keys, saved WiFi networks, edits
under /etc (/etc/nix-badge included), and anything a deploy added to the Nix store.
The system on the read-only store partition isn’t touched.
This is useful when a change to /etc stops the badge from booting properly, or before
you give the badge to someone else.
With a data card in the slot, the reset formats the card’s
EXT_USERDATA instead, and the eMMC keeps everything. Take the card out first if you want
to reset the eMMC.
Changing the button mapping
U-Boot reads the profile names from its environment, in nixbadge_profile_default,
nixbadge_profile_boot and nixbadge_profile_user (U-Boot and the rest of the software
call BUTTON the USER button). An unset or invalid name falls back to the built-in one, and
a profile that the generation doesn’t have falls back to default. You can change them
from Linux with fw_setenv, though which environment that edits depends on where the
badge booted from (see How BadgeOS boots).
Router and netboot
In the default profile, the badge is a small router. Its Ethernet port and its USB-C port are one network, and the badge routes that network out over WiFi. Plug a laptop into either port and it gets an address from the badge, reaches the internet through it, and can boot a NixOS installer from it over the network.
The badge’s network
| Address | |
|---|---|
| Badge | 10.55.0.1/24 |
| Everything plugged into it | from 10.55.0.100 to 10.55.0.200 |
The badge offers itself as the gateway and DNS server only while its WiFi is connected.
Until you join a network, a computer on the USB port keeps
using its own internet, and you can still reach the badge at 10.55.0.1. The badge’s
addresses are leased for two minutes, so within about a minute of its WiFi connecting or
dropping, everything on its network picks up the change.
The badge serves DHCP, DNS, TFTP and HTTP only on its Ethernet and USB ports, never on WiFi. It forwards traffic from its network out to WiFi, but nothing on the WiFi side can reach its network.
Netboot a laptop
The badge serves the Nix Vegas NixOS installer to any x86_64 PC that can boot from the network:
- Turn off Secure Boot in the laptop’s firmware settings. The iPXE the badge serves isn’t signed by Microsoft.
- Plug the laptop into the badge’s Ethernet port.
- Boot it from the network: look for “network boot”, “PXE” or “IPv4” in its boot menu. UEFI and legacy BIOS both work.
- iPXE shows the Nix Vegas banner and offers to play Bad Apple. Press a key to watch it, or wait five seconds to boot NixOS.
The installer is about 780 MB and the badge’s Ethernet runs at 100 Mbit/s, so it takes a
minute or two to load. Once it’s up, it has internet through the badge, the Nix Vegas
extras, and a flake in /etc/nixos to start your configuration from. It carries firmware
for the common WiFi chips and for Intel and AMD graphics. NVIDIA’s doesn’t fit on the
badge, so an NVIDIA laptop gets a plainer screen until you install.
Netbooting through the USB port rarely works, since few laptops can boot through a USB network adapter, so use the Ethernet port.
When you run nixos-install, the packages come from the badge’s cache first.
The first laptop fills it; every laptop after that gets most of its packages off the
badge instead of the WiFi.
The badge also serves this manual, at http://10.55.0.1/.
Choosing the uplink
badge.router.upstream picks the
port the badge routes out of: "wifi", the default, "ethernet" or "usb". The other
wired ports make up the badge’s network. With "ethernet", the badge is a client on your
wired network and routes for whatever is on its USB port. With "usb", the computer on
the USB port is the uplink, so share its internet connection with the badge, and the
Ethernet port is the badge’s network.
Joining a wired network
In the default profile, a badge plugged into a wired network hands out addresses on it,
the way any router would. To join a wired network as a client instead, set
badge.router.upstream = "ethernet", or boot the desktop profile,
where the Ethernet port is always a plain DHCP client and the badge doesn’t route.
Turning it off
badge.router.enable turns the router
off: Ethernet does DHCP again, and the USB link offers no gateway.
badge.ipxe.enable turns off just netboot,
the manual’s web server and the cache.
The badge’s cache
Every laptop that installs NixOS from the badge wants the same few gigabytes of packages, and at DEF CON they all come over the same WiFi. So the badge keeps them. It’s a binary cache for everything on its network: the netbooted installer asks the badge first, the badge fetches each path once, from cache.nixos.lv or else cache.nixos.org, hands it to you as it arrives, and keeps a copy. The next laptop gets that copy over Ethernet. Everyone wins, especially the WiFi.
When it runs
The cache runs with a data card in, or on a badge booted from its SD card, and only in the default profile, where the badge is a router. The eMMC has about 800 MB to spare, which is roughly one web browser, so the cache stays off there.
To check, from a computer on the badge’s network:
$ curl http://10.55.0.1/nix-cache-info
StoreDir: /nix/store
WantMassQuery: 1
Priority: 30
A 404 means it isn’t running. Nix asks caches in priority order, lowest first, and 30 beats cache.nixos.org’s 40, so a laptop asks the badge before it asks the internet.
What it keeps
The first fetch of a path goes at the speed of the badge’s WiFi. After that it comes off the card, at up to the Ethernet port’s 100 Mbit/s.
Nix only keeps a path once everything it refers to is there too, and a netbooted laptop already has the installer’s own packages, so it never asks the badge for those. The badge fetches them itself, in the background, and only while no laptop is downloading from it: your install gets the WiFi first. So the first install on a card pulls the installer’s base system over the WiFi one more time, and every install after that gets all of it from the badge.
Everything lives on the card, next to whatever else the badge writes. Every five minutes the badge checks: under 4 GiB free, it stops keeping new paths and collects garbage until 8 GiB are free again. The cache is only packages the badge can fetch again, so nothing is lost but time.
Trust but verify
The badge signs nothing. It passes on the signatures the paths came with, from cache.nixos.org and our Hydra, so your laptop trusts exactly what it would have trusted anyway. That’s also why plain HTTP is fine. A path signed by anyone else is neither kept on the badge nor accepted by your laptop.
See for yourself. Ask the badge about any package from nixpkgs on your laptop, using the first 32 characters of its name, and the signature is right there in the answer, even for a path the badge has never seen:
$ curl -s http://10.55.0.1/<hash>.narinfo | grep ^Sig:
Sig: cache.nixos.org-1:...
Use it from another machine
Any NixOS machine on the badge’s network can use it too. Allow it once in your configuration:
nix.settings.trusted-substituters = [ "http://10.55.0.1" ];
nix.settings.extra-trusted-public-keys = [
  "citadel.build.dc.nixos.lv-1:UZbkvFcWZr/VP7cvNPLRpcMTCvaYw7X5XQDzA+nPVxY="
];
That key is our Hydra’s. Leave it out and you still get everything from cache.nixos.org, just not what we built. Then, while you’re plugged into the badge, ask for it:
$ sudo nixos-rebuild switch --option extra-substituters http://10.55.0.1
nix build and friends take the same --option. We don’t recommend making the badge a
permanent substituter: once you’ve left its network, Nix would knock on 10.55.0.1 before
every download, and wait a good while for nobody to answer.
Options
badge.cache.enable follows
badge.ipxe.enable and needs it: the
cache answers on the same web server as the netboot files. And
badge.cache.upstreams lists where
misses come from, in order.
LED ring and OLED screens
The badge’s 24-LED ring and the optional OLED panel are driven by pure Nix. Every LED
pattern and every OLED screen is a Nix function from the badge’s state to a frame, and the
nix-badge daemons evaluate it frame after frame with an evaluator built into the daemon.
You can write your own on the badge itself and see them a second later.
Where the content lives
At boot, /etc/nix-badge is filled with links to the default content:
| Path | Contents |
|---|---|
/etc/nix-badge/bling.d/ | LED patterns, NN-name.nix, cycled in name order |
/etc/nix-badge/oled.d/ | OLED screens, NN-name.nix, cycled in name order |
/etc/nix-badge/lib/ | Shared code for screens, imported as <nix-badge/lib/...> |
/etc/nix-badge/leds.conf | The ring’s current settings, written by nix-badge bling set |
The directory is meant to be edited in place. The links get refreshed on every boot, but a
regular file you put there is never overwritten, so you can also replace a default by
copying it over its link and editing the copy. /etc is on USERDATA, so your files
survive updates, though a factory reset will remove them.
The button marked BUTTON
While the OLED engine is running, BUTTON controls both:
| Press | Action |
|---|---|
| short (under 0.4 s) | Next LED pattern from bling.d |
| long (0.4 s to 5 s) | Next OLED screen |
| hold for 5 s or more | Switch the evaluator between fix and Nix (below) |
The OLED engine is what reads the button, and it exits when no panel is attached, so
without an OLED you’ll need to change patterns with nix-badge bling set instead.
LED patterns
A pattern is a function of a scope attribute set that returns one colour per LED and the
time until the next frame:
scope: {
  bitmap = [ /* one 0xRRGGBB integer per LED */ ];
  nextMs = 33; # milliseconds until the next frame
}
scope.width is the number of LEDs (24), scope.height is 1, scope.t is a millisecond
clock, and the rest of the fields hold the badge’s state (see the scope
below).
Here’s a pattern that swaps red and blue halves twice a second. Save it as
/etc/nix-badge/bling.d/70-police.nix:
# Red and blue halves that swap twice a second.
scope:
let
  half = scope.width / 2;
  flip = (scope.t / 500) - (scope.t / 1000) * 2 == 1;
  red = 255 * 65536;
  blue = 255;
in
{
  bitmap = builtins.genList (
    i: if (i < half) != flip then red else blue
  ) scope.width;
  nextMs = 50;
}
Check that it evaluates, then put it on the ring:
$ nix eval --impure --expr \
    '(import /etc/nix-badge/bling.d/70-police.nix) { t = 600; width = 24; }'
$ sudo nix-badge bling set --eval /etc/nix-badge/bling.d/70-police.nix
The LED service notices the change to leds.conf and switches within a frame. Since the
file is in bling.d, it’s also part of the short-press cycle now. A pattern that fails to
evaluate gets dropped, and the ring falls back to a dim blue fill until you set another
one.
nix-badge bling set also changes the ring’s other settings, and nix-badge bling show
prints the current ones:
$ sudo nix-badge bling set --brightness 32 --fps 60
$ nix-badge bling show
OLED screens
A screen has the same shape as a pattern, but its bitmap is the panel’s memory. A 128x64
panel is 8 pages of 128 bytes, each byte is a column of 8 pixels, and each integer in
bitmap packs 4 of those bytes, little-endian. That means a screen returns
width * height / 32 integers, which is 256 for a 128x64 panel and 128 for a 128x32 one. A
screen can also return wantsScan = true to ask for a WiFi and Bluetooth scan while it’s
being shown, which is what the scan screens do.
You’ll rarely need to pack bytes by hand, since <nix-badge/lib/draw.nix> draws text,
lines, rectangles and bars onto a surface and packs it for you. Save this as
/etc/nix-badge/oled.d/80-hello.nix:
# A name tag with the uptime underneath.
scope:
let
  d = import <nix-badge/lib/draw.nix> { inherit (scope) width height; };
  small = d.spleen5x8;
  s0 = d.drawText d.empty 0 0 "HELLO";
  s1 = small.drawText s0 0 (d.height - small.height) "up ${toString scope.uptimeS}s";
in
{
  bitmap = d.pack s1;
  nextMs = 1000;
}
d.drawText uses the 12x22 Sun Gallant font, and d.spleen5x8 and d.spleen8x16 are
smaller Spleen faces with the same drawText and textWidth. The library also has
setPixel, hline, vline, rect, fillRect and drawBar, and the default screens in
/etc/nix-badge/oled.d are good examples of how to use them.
Check that it evaluates, then restart the engine, which reads oled.d when it starts:
$ nix eval --impure -I nix-badge=/etc/nix-badge --expr \
    '(import /etc/nix-badge/oled.d/80-hello.nix) { width = 128; height = 64; uptimeS = 42; }'
$ sudo systemctl restart nix-badge-oled
A screen that fails to compile is skipped and the others still load. The engine’s log
(journalctl -u nix-badge-oled) says which one failed and why.
The scope
Both kinds of program get these fields, though a pattern won’t use all of them:
| Field | Meaning |
|---|---|
t | Milliseconds on a monotonic clock |
frameIndex | Frame counter, rising by one each frame |
width, height | Panel size in pixels, or the LED count and 1 |
batteryMv, batteryPct | Battery pack voltage and charge estimate |
vselMv | The system supply rail, near 5000 on USB power |
onUsb | Whether USB power is present |
load1 | One-minute load average (a float) |
cpuPct, memPct | CPU and memory use, in percent |
uptimeS | Seconds since boot |
strap | The core the boot strap selects: 1 ARM, 2 RISC-V, 0 unknown |
backend | The evaluator running this program: 0 fix, 1 Nix |
fps | The measured frame rate |
nixosVersion, kernelVersion | Strings for the running system (screens) |
ethName, ethIp, wlanName, wlanIp | Network interfaces and their IPv4 addresses (screens) |
Evaluators
There are two evaluators that can run these programs. The default is fix, an embedded Nix evaluator written in Zig that runs on both cores. The other is the upstream Nix evaluator through its C API, which is only linked on ARM, so asking for it on RISC-V falls back to fix.
Holding BUTTON for 5 seconds switches the OLED engine between them, and the choice is
remembered in /etc/nix-badge/oled.backend. The defaults come from the
badge.oled.backend and
badge.bling.backend
options.
Writing fast programs
Your program runs every frame on a small CPU.
Anything that doesn’t depend on scope should be hoisted into a let above the lambda,
since a table built inside the function gets rebuilt on every frame. The default effects
do this with their lookup tables and fonts.
Stick to builtins so that both evaluators can run your program. There’s no nixpkgs lib
on the badge, but integer helpers like mod are in <nix-badge/lib/oled.nix> and
draw.nix. Colours, coordinates and the clock are all integers, so keep your math in
integers too.
Only ask for frames as often as you need them, since nextMs sets the frame rate, and a
clock only needs one frame a second.
The demoscene effects in /etc/nix-badge/oled.d (70-xor to 76-rotozoom) and the Bad
Apple player in 10-badapple.nix are good examples of fast screens.
In your NixOS configuration
The same programs can be set declaratively:
{
  badge.bling.evalPattern = ./my-pattern.nix;
  badge.oled.evalScreens = [ ./my-screen.nix ];
}
badge.bling also sets the LED count, the SPI timing and
the brightness, and badge.oled sets the panel size, the
controller and the button.
Switching CPU cores
The SG2000 has two application processors, and it runs one of them at a time:
| Core | Nix system | Notes |
|---|---|---|
| ARM Cortex-A53 | aarch64-linux | The default, and the faster of the two |
| RISC-V T-Head C906 | riscv64-linux | Slower; the desktop takes minutes longer to come up |
A hardware strap decides which core runs at power-on. A BadgeOS card has a complete
system for each core, and its single fip.bin boots whichever one the strap selects (see
How BadgeOS boots), so switching cores only takes a reboot. On a
LicheeRV Nano the strap is a resistor, so switching means moving it (see
The LicheeRV Nano).
The builtins.currentSystem switch
The badge’s core switch is labelled builtins.currentSystem. Yes, really, this is not a
joke. It has three positions: two of them force the ARM (aarch64-linux) or the RISC-V
(riscv64-linux) core, and the third, AUTO, takes the choice from a latch that software
can set, which is what the commands below use.
Switching from Linux
Check the current selection, latch the other core, and reboot with the switch on AUTO:
$ nix-badge core status
strap readback: 0 (arm)
$ nix-badge core riscv
core-select latch set to riscv
strap readback: 1 (riscv)
$ sudo systemctl reboot
nix-badge core arm switches back. The latch is driven through GPIO lines, and the
badge user is in the gpio group, so this doesn’t need sudo. If the strap still
reads the old core after nix-badge core, the switch isn’t set to AUTO.
Switching with the BOOT button
With the switch on AUTO, holding BOOT for 3 seconds while the badge is running latches the other core and reboots into it. A short press does nothing.
What differs between the cores
Both systems are built from the same configuration, but each core has its own kernel,
device tree and boot image, under /boot/arm and /boot/riscv. Each core also keeps its
own system profile (system-arm and system-riscv), so deploying to one core never
removes the other core’s generation, and a deploy never switches cores.
We don’t recommend building on the badge on either core. Build on your computer and deploy instead (see Updating).
The pure-Nix LED patterns and screens run on either evaluator, but the upstream Nix C API evaluator is only available on ARM (see LED ring and OLED screens).
Installing to the eMMC
The badge has its own eMMC storage. Installing BadgeOS there frees up the SD card slot and gives you A/B updates with automatic fallback. The installer runs on a badge that’s booted from its SD card.
Run the installer
Boot the badge from a BadgeOS SD card and run this, on a console or over SSH:
$ sudo nix-badge-install
The installer works in two steps.
The first time you run it, a badge whose identity isn’t fused yet will ask for its serial number, which is written on the Ethernet port:
We are setting up the SoC for the first time.
Please enter the serial number, written on the ethernet port: 7
Is 7 correct? This is permanent! [yes/no] yes
Fuse settings will be applied at reboot.
The number becomes the serial SG1-0007. It gets burned into the SoC’s eFuses, which
can’t be changed afterwards, so make sure it’s right. A badge that’s already fused shows
its serial instead and skips this step.
Next, the installer looks at what’s on the eMMC and prints its plan before doing
anything. A blank eMMC (or one without BadgeOS on it) gets the SD card’s partition layout
and a copy of the SD card’s system in both slots, which erases the eMMC. An eMMC that
already has BadgeOS gets updated instead: the SD card’s system goes into both of its
slots, one after the other, and its USERDATA is kept.
Answer yes to go ahead. Then, if the system has data cards on, the installer asks
whether to turn the SD card into a data card. At the end it waits for Enter
and reboots.
Fusing the identity
If you entered a serial number, the fuses are written by U-Boot over the next boots,
rather than by the installer. Before rebooting, set the
builtins.currentSystem switch to AUTO. The
badge then starts on the RISC-V core, fuses the serial, the board record and the badge’s
device key, switches back to ARM, and resets itself.
With the switch on ARM, the serial and board record are fused on the next boot, and the
device key waits until the first RISC-V boot. Once the serial is fused, the badge’s
hostname gets its number, so SG1-0007 becomes nix-badge-07, and its USB network
adapter reports the serial as well.
Boot from the eMMC
If you kept the SD card as it was, power the badge off, take the card out, and power it
back on. With no bootable card in the slot, the badge boots from the eMMC. A bootable
card always takes priority, which is also how you get back to the installer later: boot a
newer card and run nix-badge-install again to update the eMMC from it while keeping its
user data. If you turned the card into a data card, leave it in. The badge is already
booting from the eMMC.
The eMMC has the same layout as the card (see How BadgeOS
boots), with two system slots, A and B, and a
USERDATA partition. Nothing from the SD card’s USERDATA is copied over, so you’ll need
to set up your SSH keys and WiFi networks again on the eMMC system, unless the card stays
in as a data card.
More room
The eMMC’s USERDATA is small. A data card in the SD slot gives an
eMMC badge more room for everything it writes, and leaves the eMMC as it was when the card
comes out.
The card you installed from can be that data card. When the system has data cards on,
nix-badge-install offers to convert it at the end.
That’s also the easy way to keep your SSH keys and WiFi networks: they stay on the card,
and the eMMC system uses them whenever the card is in. The badge then reboots into the
eMMC with the card left in. The first boot doesn’t use the card yet. The second one does.
Data cards
The eMMC is small, and its USERDATA is smaller. A data card fixes that. Put a microSD
card in a badge installed to the eMMC, and everything the badge writes goes to
the card. What was on the eMMC’s USERDATA is still there underneath, read-only. Take
the card out and the badge is exactly as it was before the card went in.
Any SD card works, as long as its GPT has an ext4 partition named EXT_USERDATA. That
name is the whole trick. A BadgeOS card calls its partition USERDATA, so a card the
badge boots from is never mistaken for a data card. A badge booted from an SD card can’t
use a data card either, since there’s only one slot.
Make a data card
From a BadgeOS card
If you installed the eMMC from an SD card, you already have one. When nix-badge-install
finishes, it asks:
Turn this SD card into a data card for the eMMC system? [yes/no]
Say yes, and it renames the card’s USERDATA to EXT_USERDATA and empties its BOOT,
so the badge stops booting from the card. Then it reboots into the eMMC with the card
still in. The first boot runs on the eMMC alone while it sets itself up. The card joins
in from the second.
Everything the card’s system wrote comes along: passwords, WiFi networks, SSH keys and
home directories. Its Nix store doesn’t, so the card starts over from the eMMC’s. The
card keeps its (now empty) BOOT, so you can deploy with it in,
and its NIX_A and NIX_B partitions stay on it, unused.
Said no? Boot the card again and run sudo nix-badge-install. It updates the eMMC from
the card, keeps the eMMC’s user data, and asks again.
A data card doesn’t boot, so it’s no longer the card to reinstall from. Flashing it again turns it back into a BadgeOS card, and erases it.
From a blank card
You’ll need a computer with a card reader. This erases the card, so check its name with
lsblk first. A USB reader shows it as /dev/sdX, and a built-in one as /dev/mmcblkN,
whose partitions are /dev/mmcblkNp1 and so on. If you’re missing a tool,
nix shell nixpkgs#gptfdisk nixpkgs#dosfstools nixpkgs#e2fsprogs has them all.
We recommend giving the card a FAT32 partition named BOOT too, so you can
deploy to the badge with the card in:
$ sudo sgdisk --zap-all /dev/sdX
$ sudo sgdisk -n 1:0:+512M -t 1:0700 -c 1:BOOT -n 2:0:0 -c 2:EXT_USERDATA /dev/sdX
$ sudo mkfs.vfat -F 32 -n BOOT /dev/sdX1
$ sudo mkfs.ext4 -L EXT_USERDATA /dev/sdX2
If you only want the space:
$ sudo sgdisk --zap-all /dev/sdX
$ sudo sgdisk -n 0:0:0 -c 0:EXT_USERDATA /dev/sdX
$ sudo mkfs.ext4 -L EXT_USERDATA /dev/sdX1
Use it
Power the badge off, put the card in, and power it on. The login message tells you when a card is in use:
Data card in use: writes go to /dev/mmcblk0p5; the eMMC is read-only.
The partition depends on the card (p5 is a converted BadgeOS card). The boot info
screen on the OLED says so too, and /run/nix-badge/storage reads card followed by the
card’s partition.
Power off before you take the card out, too. The card holds /etc, /home, the swap
file and the newest layer of the Nix store, so pulling it from a running badge pulls
those out from under it. A card that goes in while the badge is running does nothing
until the next boot.
Nothing reaches the eMMC’s USERDATA or its system slots while the card is in use.
Deploys made with the card in live on the card, and boot again whenever it’s back, as
long as the eMMC’s system didn’t change in the meantime (see below). RAUC won’t install
a bundle while a card is in use, so take the card out to
update with a bundle.
Things to know
- A card belongs to the badge it was first used in. Another badge won’t use it, and
says why on the console, but a factory reset on that badge still formats it. To move
a card to another badge, factory reset with the card in, or reformat its
EXT_USERDATAon a computer. - Files on the card win. A password, WiFi network or SSH key changed with the card out comes back as the card’s older copy whenever the card is in, so make changes with the card in.
- That includes the SSH host keys. A card made from a BadgeOS card brings its old system’s keys, so the badge has one host key with the card in and another without it. Your SSH client will complain when you switch. That’s expected.
- If the eMMC’s Nix store changed while the card was out (an update, a deploy, a garbage
collection, a factory reset, even a
nix shell), the card’s Nix store is emptied at the next boot with it in, along with any deploy it held. Its other files stay. - The first boot of a newly installed or updated eMMC system ignores the card while it sets up the eMMC’s side, and says so. The next boot uses the card.
- A factory reset with a card in formats the card, not the eMMC.
- The badge’s cache lives on the card too. With a card in, the laptops on the badge’s network get their packages from the badge; without one, straight from the internet.
- Early in every boot, stage 0 (the small script that sets up storage, see How BadgeOS boots) looks for the card once. If the card isn’t there yet (it isn’t seated, or it’s slow to show up), the badge carries on without it and says nothing, so if the login message doesn’t mention the card, reseat it and reboot.
- Data cards are on by default on badges with an eMMC. Set
hardware.sg2k.externalStorage.enabletofalseto turn them off, and U-Boot ignores a card’s boot images too.
When a card isn’t used, Troubleshooting lists the reasons stage 0 gives. How BadgeOS boots describes what gets mounted where.
Updating
There are three ways to put a newer BadgeOS on a badge, and which one you want depends on where the badge boots from and who built the update.
| Method | Boots from | Keeps your data | Who it’s for |
|---|---|---|---|
| A new SD card image | SD card or eMMC | eMMC: yes; a reflashed card: no | Everyone |
| RAUC bundle | eMMC | Yes | Everyone, with a signed bundle |
| deploy-rs | SD card or eMMC | Yes | Developers with their own builds |
A new SD card image
Build and flash a card from the
newer BadgeOS. A badge that runs from its SD card just boots the new card, with a fresh
USERDATA.
For a badge that’s installed to the eMMC, boot the new card and run the installer again:
$ sudo nix-badge-install
It sees that the eMMC already has BadgeOS on it, and writes the card’s system into both
of the eMMC’s slots while keeping the eMMC’s USERDATA. Then take the card out and
reboot.
RAUC bundles
A badge installed to the eMMC has two system slots, A and B, and updates with
RAUC. A bundle (.raucb) holds the store image, the boot images for
both cores, and the firmware. Install one with:
$ sudo rauc install nix-badge-<version>.raucb
$ sudo systemctl reboot
RAUC writes the slot that isn’t running and makes it the first choice for the next boot.
U-Boot gives each slot three tries, and a system that comes up marks itself as good. If
the new system fails to boot three times, U-Boot falls back to the other slot on its own.
rauc status shows both slots and which one is booted.
RAUC refuses to install while a data card is in use, since the eMMC
is read-only then. It only says Pre-install handler error, and journalctl -u rauc
has the reason. Power off and take the card out first.
A badge only accepts bundles signed with the key it trusts, which is
hardware.sg2k.fitKeyCert. By
default that’s our sg1-image certificate; set your own if you run your own update channel.
The repository also has a development key for the test bundles. Its private half is
committed on purpose, so a system only trusts it if it sets
hardware.sg2k.fitKeyCert = null and also turns on
hardware.sg2k.rauc.trustDevKeyring.
With neither key set, the configuration fails to evaluate.
deploy-rs
For your own builds, deploy-rs builds a system on
your computer, copies it to the badge over SSH, and activates it. You’ll need an SSH key
for the badge user (Getting started) and the
badge’s address. The nodes are cross-compiled from x86_64-linux, and the flake’s
development shell has deploy in it:
$ nix develop github:NixVegas/BadgeOS
$ deploy --hostname 10.55.0.1 github:NixVegas/BadgeOS#sg2k-arm
There’s one node per core, sg2k-arm and sg2k-riscv. Always pass --hostname with
your badge’s address, since the default in the flake points at one of our own badges.
Deploy the node for the core the badge is currently running (nix-badge core status
will tell you), because a deploy never switches cores, and each core has its own system
profile. To deploy your own changes, deploy from your checkout (.#sg2k-arm) or define
nodes in your own flake.
Activating a deploy installs the new generation’s boot image into the slot the badge
booted from and refreshes the firmware on the boot partition. Deployed generations live
in the Nix store layer on USERDATA, so a factory reset
takes the badge back to the system in its slot.
With a data card in use, a deploy goes to the card: the generation
lives on the card, and its boot image goes on the card’s BOOT, which U-Boot boots while
the card is in. The eMMC and its firmware stay as they are. A card without a BOOT
partition can’t take a deploy, and the activation says so.
When the badge boots the card’s image, /proc/cmdline has nixbadge.cardfit=1 in it.
If U-Boot can’t load or start that image, it boots the eMMC’s instead. If the deployed
system itself misbehaves, take the card out, and the eMMC’s system boots as before.
Troubleshooting
The serial console
Most problems are easier to understand from the serial console. Plug the DEBUG port into
your computer, and the CH347 on the badge shows up as a USB serial port (/dev/ttyACM0
or similar on Linux). It runs at 115200 8N1:
$ nix run nixpkgs#tio -- /dev/ttyACM0
You’ll see U-Boot, the kernel and a login prompt, and you can log in there even when the network is down.
Slow isn’t broken
A few things take long enough that it’s tempting to pull the power, which can make things worse:
- A warm reboot on the ARM core can take two or three minutes to come back.
- The RISC-V core boots much more slowly than ARM, and the desktop can take several minutes to come up there.
- The first boot of a new card grows
USERDATAto fill the card and makes a swap file.
The badge doesn’t boot
If the badge stopped booting after you changed something under /etc, a factory
reset puts USERDATA back the way it was on a fresh card.
If the SD card itself is the problem, flash it again, writing the whole card rather than a partition.
A badge installed to the eMMC falls back to its other slot by itself after three failed
boots (see Updating). If neither slot boots, a bootable SD card
always takes priority over the eMMC, so you can boot a BadgeOS card and run
sudo nix-badge-install again to update the eMMC from it.
Data cards
When a badge doesn’t use its data card, stage 0 says why on the
console as it boots, in a line starting with stage-0: (sudo dmesg | grep stage-0
shows it later):
no EXT_USERDATA partition: no GPT partition is namedEXT_USERDATA. A file system labelledEXT_USERDATAdoesn’t count, and neither does a BadgeOS card’sUSERDATA. A slow card can say this too, when its partitions show up late, so reboot once before you reformat anything.set up on another badge: the card belongs to a different badge. A factory reset with the card in makes it this badge’s, and so does reformatting itsEXT_USERDATA, both at the cost of what’s on it.has not booted this image without the card yet: the eMMC’s system is new. Nothing’s wrong, and the next boot uses the card.the eMMC has no USERDATA partitionorthe eMMC's USERDATA does not mount read-only: the problem is on the eMMC side. Take the card out and boot without it.e2fsck -pordoes not mount as ext4: check the card’s file system on a computer withfsck.ext4.
If stage 0 says nothing about the card at all, it never saw one. Reseat the card and reboot.
A few stage-0: lines about the card are routine, not errors. holds slot A Nix state from before it was a data card shows up the first time a card made from a BadgeOS card
is used, and resetting the card's Nix layer after the eMMC’s system changed while the
card was out. If that card held a deploy, you also get boot image for slot A belonged to the Nix layer just reset: that boot runs the eMMC’s system on the card’s kernel, and
the next one is all eMMC.
nixbadge.cardfit=1 but no data card is in use means U-Boot booted the kernel from the
card’s BOOT, but stage 0 couldn’t use the card after all, so the eMMC’s system is
running on the card’s kernel. Fix the card, or take it out, and reboot.
/run/nix-badge/storage says what the badge is using: emmc, sd, or card and the
card’s partition.
sudo rauc install failing with Pre-install handler error: Child process exited with code 1 means a data card is in use, and RAUC won’t touch the eMMC under it.
journalctl -u rauc has the full message. Power off, take the card out, boot, and
install again.
SSH warning that the badge’s host key changed after you put a card in or took it out? A card made from a BadgeOS card brings that card’s host keys along, so the badge has a different key with and without it. That’s expected.
The badge stops responding
If the console is dead and the badge doesn’t answer on the network, power-cycle it. If you had the A53’s SWD wiring set up, you can also reset it through the watchdog without touching the power (see Resetting a hung badge).
Starting OpenOCD kills the CH347’s serial console until you reset the USB device with
nix shell nixpkgs#usbutils -c usbreset 1a86:55dd, which can look like a hang if you
don’t know about it.
A button or another feature doesn’t work
Some v2.0 badges have cold solder joints on the SoM, where the Duo Module 01’s castellated pads meet the badge. If a button or anything else doesn’t work, that’s a good first suspect. Look along the module’s edges with a loupe or a microscope, and touch up any joint that looks dull or never flowed onto its pad with a fine-tipped iron and a little flux.
HDMI
HDMI only gets its 5 V when the badge is on USB power, so it doesn’t work on batteries alone. If HDMI stays black after a warm reboot, power-cycle the badge: the HDMI bridge has no reset line and stays powered across a reboot, so it can keep a bad state. The HDMI link covers the other ways it fails and what each one looks like.
USB
The USB port is a USB device in the default profile and a host in the desktop profile, so the USB network link only exists in the default one. Host mode needs power coming in through the DEBUG port, since the batteries can’t supply 5 V to whatever you plug in.
WiFi
If a WPA3 network refuses to associate with a profile made in nmtui, see the tip in
Getting started.
The laptop installs from the internet, not the badge
The badge’s cache only runs with a data card in, or on an SD boot, and only
in the default profile. From the laptop, curl http://10.55.0.1/nix-cache-info should
answer Priority: 30. A 404 means it isn’t running, and the install carries on without
it, just slower. With less than 4 GiB free on the card, the badge passes packages through
but stops keeping them, so the next laptop is slow too; it collects garbage on its own
within five minutes.
Something on my wired network got an address from the badge
In the default profile the badge is a router, and its Ethernet port is the
badge’s own network, so it hands out addresses to whatever it’s plugged into. To join a
wired network as a client, set
badge.router.upstream to
"ethernet", or boot the desktop profile.
Security
BadgeOS is set up for hacking on a badge at a conference, not for keeping secrets.
Logins
The default login is badge with the password nixbadge, and it’s printed on the back of
the badge. root starts with the same password. Change both with passwd (and
sudo passwd root) after you first log in.
badge is in the wheel group and can use sudo without a password, so a shell as
badge is a root shell. SSH only accepts keys, and root can’t log in over SSH at all,
so the passwords only matter on the serial console and the Sharp display.
The network
The NixOS firewall is on. From the network, the badge only listens for SSH (port 22). In the default profile it’s also a router: it serves DHCP, DNS, TFTP and HTTP on its Ethernet and USB ports, never on WiFi, and it forwards traffic from those ports out to WiFi but nothing from WiFi in. Its HTTP serves this manual, the netboot files and a binary cache that signs nothing: packages carry the signatures they came with, so the badge can’t vouch for one even if it wanted to. The music player daemon only listens on localhost. Bluetooth is powered on at boot.
Physical access
Anyone holding the badge can plug into the DEBUG port and get the serial console, along with JTAG for the RISC-V core (see JTAG). If the passwords haven’t been changed, the console is a root shell.
A data card takes everything the badge writes, /etc included, so
whoever can write to the card can change the system the way they could by writing to
USERDATA. A card with a BOOT partition also holds the kernel U-Boot boots. With
verified boot on, U-Boot still only boots images signed with the key it trusts. The
card’s files also win over the eMMC’s: a password changed with the card out, say because
it leaked, is the old one again whenever the card is in. Change it with the card in too.
Updates and boot
A badge only installs RAUC bundles signed with the key it trusts, which is our sg1-image key unless you set your own, and the development key in the repository is only trusted if you explicitly ask for it (see Updating).
Verified boot is available, but on the SG2000 it can’t be a guarantee, because the mask ROM has a bug that lets unsigned code run on fused parts (see Signed firmware and verified boot).
How BadgeOS boots
You don’t need any of this to use the badge, but it’s useful if you’re building on BadgeOS for other SG200x boards.
The boot chain
- Mask ROM. The SG2000 starts whichever core its boot strap selects (see
Switching CPU cores), and that core’s mask ROM loads
fip.bin, either from the SD card’s first FAT partition or from the eMMC’s first boot area. fip.bin. We ship one polyglot firmware image that’s valid for both cores. It holds the first-stage loader, followed by ARM Trusted Firmware BL31 and U-Boot for the A53, or OpenSBI and U-Boot for the C906. The images are built by sophgone.- U-Boot reads the BOOT button and BUTTON to pick a profile, picks a
system slot (A or B, see below), and loads two files for that slot from the boot
partition:
/<core>/slot-<X>/boot.itb, a FIT image with a kernel, a device tree and a boot script for each profile, andvbmeta.itb, which describes the slot’s verified root. On an eMMC boot with a data card in,boot.itbcomes from the card’sBOOTwhen the card has one for the slot. - Linux starts without an initrd. It sets up the root file system with dm-verity
from the slot’s store partition, which is a read-only squashfs, and runs
/init-<core>. - Stage 0, a small script in the store image, mounts
USERDATA(formatting it first on a factory reset), sets up the writable directories and the Nix store overlay, and starts the slot’s NixOS system for this core.
Storage layout
An SD card and an installed eMMC have the same partitions, found by name:
| # | Name | Contents |
|---|---|---|
| 1 | BOOT | FAT32, 512 MiB: fip.bin, the per-core slot directories with boot.itb and vbmeta.itb, and secure (whether the images are signed) |
| 2 | UBOOT | The U-Boot environment |
| 3 | NIX_A | Slot A, 3 GiB: a squashfs Nix store with the systems for both cores, verified with dm-verity |
| 4 | NIX_B | Slot B, 3 GiB: the same; a fresh card or eMMC has the same system in both slots |
| 5 | USERDATA | ext4: all writable state; grows to fill the card on first boot |
The partition table is GPT with a hybrid MBR, because the mask ROM finds the boot
partition through the MBR. On the eMMC, the firmware lives in the first hardware boot area
instead of in BOOT, and the U-Boot environment lives in the second one.
A read-only system
The root file system is the verified squashfs, and nothing ever writes to it. Everything
that changes lives on USERDATA and is mounted over it. /etc, /var, /home, /root,
/tmp and /nix/var are bind mounts from USERDATA, and only /nix/var allows
executing files. The Nix store is an overlay store, with the squashfs store as its
read-only lower layer, and paths added later (by a deploy, for example) go into an upper
layer on USERDATA that belongs to the booted slot. A swap file on USERDATA (512 MiB on
an SD card, 256 MiB on the eMMC’s smaller one) and compressed RAM swap (zram) help make up
for the small amount of memory.
Data cards
On an eMMC boot with a data card in, stage 0 mounts the eMMC’s
USERDATA read-only at /.lower-userdata and the card’s EXT_USERDATA at /.userdata.
/etc, /var, /home and /root are overlays of the card’s directory over the eMMC’s,
/tmp and the swap file are the card’s alone, and the Nix store is three layers deep: the
card’s upper layer over the eMMC slot’s upper layer over the squashfs, each one a Nix
local-overlay store over the next.
U-Boot looks at the card only when the eMMC’s own boot.itb for the slot says the
eMMC’s system has data cards on, and only while the card’s EXT_USERDATA marks its
boot.itb for that slot as current. If the card’s image doesn’t boot, the eMMC’s boots
instead. When the card’s does, U-Boot adds nixbadge.cardfit=1 to the kernel command
line and stage 0 starts the card’s generation; otherwise stage 0 starts the eMMC’s, so the
kernel and the system always come from the same place. The card also records which eMMC
it was used with (the eMMC’s CID, its USERDATA file system, and the system and Nix
database of each slot), and stage 0 checks that before using it.
Slots and updates
The two store partitions are A/B slots managed by RAUC and U-Boot.
U-Boot’s environment holds the boot order (BOOT_ORDER) and a counter of remaining tries
for each slot (BOOT_A_LEFT, BOOT_B_LEFT). An update writes the inactive slot and puts
it first in the boot order. Each boot of a slot uses up one try, and a system that comes
up successfully resets its counter. A slot that runs out of tries gets skipped, so a broken
update falls back to the previous system on its own (see Updating).
The U-Boot environment
fw_printenv and fw_setenv are installed. On a badge with an eMMC, their default
configuration in /etc/fw_env.config points at the eMMC’s environment, even when the badge
booted from the SD card. To read or change the SD card’s environment, pass its own
configuration:
$ fw_printenv -c /etc/fw_env-sd.config
$ sudo fw_setenv -c /etc/fw_env-sd.config nixbadge_profile_user desktop
Signed firmware and verified boot
Two options control signing, and they’re independent of each other.
hardware.sg2k.firmware.secureBoot
is for a part whose secure-boot fuses are burned. Its mask ROM checks an RSA signature
chain on fip.bin and refuses to boot an unsigned one.
hardware.sg2k.firmware.encryptedBoot
also encrypts it, for parts that are fused to require that.
hardware.sg2k.secureBoot turns
on the verified-boot chain. The U-Boot inside the signed firmware then only boots FIT
images signed with the key in
hardware.sg2k.fitKeyCert, and
the slot’s vbmeta.itb, which pins the dm-verity root, is signed with it as well.
Signed images can only be built on a machine with the signing key.
Two private keys are committed to the repository on purpose, for tests only: the
sg1-image test key that the FIT signing tests use
(pkgs/v2/by-name/nix-badge-fit-signing/test-key), and the RAUC development key for the
test bundles (pkgs/v2/by-name/nix-badge-rauc-dev-keyring). A badge doesn’t trust either
of them unless you ask it to, and the development keyring needs
hardware.sg2k.rauc.trustDevKeyring (see Updating).
Verified boot raises the bar, but on this SoC it can’t be a guarantee. The SG2000 mask ROM copies the first boot stage before it checks the signature, and sophgone uses that to run unsigned code on fused parts. Remember, immutable means it’s broken f o r e v e r. The sophgone README has the details.
The kernel
Each core runs a recent mainline kernel with the SG200x patch series from Armbian, a few fixes of our own, the AIC8800 WiFi driver, and the vendor’s display and video drivers forward-ported to mainline for HDMI. The device trees for both cores live in the repository and are built against the same kernel.
Using the NixOS module
BadgeOS is also a board support package for the Sophgo SG200x family, as a set of NixOS modules. That covers the kernel and device trees, the boot firmware and boot images, the A/B storage layout, WiFi, the display, and the badge’s own peripherals. It’s one module that does nothing until you enable it.
The flake exposes nixosModules.v2 (also available as nixosModules.default), which is
the board support package itself, and overlays.v2 (also overlays.default) with its
packages, which the module adds to nixpkgs.overlays on its own. There’s also
overlays.v1 with the firmware for last year’s ESP32-C6 badge, which needs the
nixpkgs-esp-dev overlay applied as well.
In your flake
BadgeOS builds on NixOS 26.05, so follow its nixpkgs:
{
  inputs = {
    badgeos.url = "github:NixVegas/BadgeOS";
    nixpkgs.follows = "badgeos/nixpkgs-2605";
  };

  outputs =
    { nixpkgs, badgeos, ... }:
    {
      nixosConfigurations.my-badge = nixpkgs.lib.nixosSystem {
        modules = [
          badgeos.nixosModules.default
          {
            hardware.sg2k.enable = true;
            # The board, "nix-badge" by default; the system runs on its first core
            # (ARM on the badge) unless nixpkgs.hostPlatform says otherwise.
            hardware.sg2k.board = "nix-badge";

            # Your own configuration.
            networking.hostName = "my-badge";
          }
        ];
      };
    };
}
hardware.sg2k.enable enables the whole board support package. Set
nixpkgs.hostPlatform to "riscv64-linux" for the badge’s C906 core (the Nano runs on
its C906 unless you set "aarch64-linux" for its A53), and nixpkgs.buildPlatform to
cross-build from your machine.
Boards and hardware
hardware.sg2k.board picks the board, either nix-badge (our badge, an SG2000) or
licheerv-nano (the Sipeed LicheeRV Nano, an SG2002). Both chips have an ARM and a
RISC-V core, and BadgeOS builds a system for each. The board turns on the hardware it
has, and you can turn any of it off with hardware.sg2k.emmc.enable, ethernet.enable,
wifi.enable (with wifi.bluetooth), hdmi.enable (with hdmi.audio),
ledRing.enable, oled.enable, sharpPanel.enable and coreSelect.enable. When a
piece of hardware is off, the services, drivers and images that use it are left out. On
the badge, ethernet.enable doesn’t do anything yet, and turning WiFi off leaves its
SDIO controller enabled in the device tree.
The LicheeRV Nano
The Nano runs one of its two cores, and a small (0201) strap resistor on the board decides
which one at power-on. It ships set for the RISC-V core, and to boot the ARM core you
move the resistor to its other position with a soldering iron. There’s no switch or
latch like the badge’s, so the core can’t be changed from Linux or with a button, and
coreSelect.enable stays off.
There are three SD card images for the Nano:
| Package | Systems on the card | fip.bin |
|---|---|---|
licheerv-nano-sdcard | ARM and RISC-V | The polyglot fip, for either core |
licheerv-nano-sdcard-riscv | RISC-V | The RISC-V fip |
licheerv-nano-sdcard-arm | ARM | The ARM fip |
The two-core card has a system for each core and the polyglot fip, so it’s the one to use
if you’re going to move the resistor. A one-core card builds only one system, and it only
boots when the resistor selects its core. Every Nano system installs the polyglot fip
when it’s deployed or updated, so a one-core card’s fip.bin becomes the polyglot after
its first update. The licheerv-nano-bundle update carries both cores, like the two-core
card, so installing it on a one-core card adds the other core.
$ nix build github:NixVegas/BadgeOS#licheerv-nano-sdcard
Write it to a card the same way as the badge’s (see Getting started).
The firmware on its own is in licheerv-nano-fip (the polyglot), licheerv-nano-fip-arm
and licheerv-nano-fip-riscv, and the two systems deploy as licheerv-nano-arm and
licheerv-nano-riscv (see Updating).
Other boards
If your board is close to one of these but not quite the same, everything a board file
sets is only a default, including soc, cores, memory.sizeMiB, dtb.name,
dtb.package and firmware.fips, so you can set your own values and they’ll take over.
A dtb.package needs to support .override { kernel; usbHost; }, and firmware.fips
needs a fipArm or fipRiscv for each core in cores, and a fipPolyglot when there
are two. A new board should get its own value of hardware.sg2k.board and a board file
in modules/sg2k/boards, and we’re happy to take patches for that.
What you can change
Everything the badge configures is an option, and the options are documented in the options reference and on the search page. A custom board will usually set some of the following:
- the LED ring’s LED count and SPI timing, or turn it off
- the OLED panel’s size and controller, or turn the engine off
- the USB role, and the addresses that the USB network link uses
- whether the desktop and video profiles get built
- signed firmware and verified boot, for fused parts
Contributing
BadgeOS lives at github.com/NixVegas/BadgeOS, and
pull requests are welcome there. This page is also the repository’s CONTRIBUTING.md.
Finding your way around
flake.nixonly has the inputs; the outputs are flake-parts modules inflake/, withflake/v2for this year’s badge andflake/v1.nixfor last year’s.modules/sg2kis the NixOS module, with the board files inmodules/sg2k/boardsand the per-badge host configurations inmodules/hosts.pkgs/v2is the overlay: packages inby-name, the device trees infirmware/dts, the kernel patches inkernel/patches, our patches to nixpkgs packages (wlroots, sway, pixman and SDL3) inpatches, and our trims of them (Mesa, SDL3, mpd) inoverlays.pkgs/v1is last year’s ESP32-C6 firmware.testshas the checks,siteis this documentation, andhydradeclares the Hydra jobsets.
Building and checking
nix develop gives you a shell with deploy (deploy-rs) for putting your builds on a
badge (see Updating), and nix fmt formats the tree with
nixfmt.
The checks are flake checks, so you can build one at a time:
$ nix build .#checks.x86_64-linux.sg2k-no-emmc
Most of them evaluate a whole NixOS system or two, which takes a few GB of memory each, so
build them one at a time on a small machine rather than running nix flake check. A few
checks and Hydra jobs sign things with our real sg1-image key through autopen (the badge1
cards and bundles, and rauc-bundle-wrong-compatible), and those only build on a machine
with the autopen system feature.
Hydra builds hydraJobs, which has v1.firmware, and under v2 each board’s toplevels,
SD card images and fips (toplevels.<board>, images.<board> and bootloader.<board>,
where the badge is nixbadge), sophgone’s fips (bootloader.sophgone), and badge #1’s
signed cards and bundles (badge1). This site is nix build .#docs, and its options reference
is generated from the module, so new options should have a description.
Branches and releases
Development happens on master. When we cut a release, it gets its own
v<major>.<minor> branch off master, and Hydra builds both: hydra/jobsets.nix makes a
jobset for each, and the download links
point at the release’s.
The version lives in one place, the flakever template in flake/version.nix. BadgeOS’s
version, the release branch’s name, and the branch in the download links all come from
it. To start a new release, bump the template on master and cut the branch. Then add the
old release branch to branches in hydra/jobsets.nix, or its jobset quietly goes away.
Style
- Write Nix in nixpkgs style, and run
nix fmt. - Keep comments short, and about the code rather than the history of how it got there.
- Don’t put big chunks of C, shell, device tree or config inline in Nix. Put them in their own files, or in patches, and reference them.
- Keep
flake.nix, the flake-parts modules, the overlays and the module’sdefault.nixshort, and put test wiring intests. - When you add an argument to a
package.nix, check that nixpkgs doesn’t have a package with the same name, sincecallPackagewill pass that package in instead of using your default. - Don’t commit keys or other secrets. The two test keys in the repository are there on purpose (see How BadgeOS boots).
- Commit messages start with the area they touch, like
sg2k:,site:orflake:.
Using LLMs on BadgeOS
LLMs are often invaluable assistants for hardware bringup. Feel free to contribute using them, and submit pull requests with code that you understand. We follow Oxide Computer’s RFD 576, “Using LLMs at Oxide”.
Testing on a badge
Deploy with deploy-rs and --boot, then reboot, so a bad generation doesn’t leave the
badge half switched. Changes to the boot chain or the device tree can stop a badge from
booting, so have the serial console on the DEBUG port handy, and see the
SoM page for resetting a hung badge.
The nix-badge command
nix-badge is BadgeOS’s own tool, written in Zig. Some of its subcommands are what the
badge’s services run, and the rest are for you. Run it without arguments for a usage
summary.
Commands for you
nix-badge power prints the system rail (VSEL, about 5 V on USB power) and the battery
pack’s voltage with an estimate of how much charge is left. The pack is three AA
primaries, so there’s no charging state.
nix-badge core arm, nix-badge core riscv and nix-badge core status set and read the
core-select latch (see Switching CPU cores).
nix-badge bling show prints the LED ring’s settings, and sudo nix-badge bling set
changes them in /etc/nix-badge/leds.conf, keeping whatever you don’t pass:
| Flag | Setting |
|---|---|
--brightness 0-255 | Brightness |
--fps N | Frame rate |
--count N | Number of LEDs |
--speed-hz HZ | SPI clock |
--bits 3|4|8 | SPI bits per LED data bit |
--eval PATH | A Nix pattern (see LED ring and OLED screens) |
--blob PATH | A prerecorded animation to play instead of a pattern |
nix-badge board-id decodes the identity fused into the SoC. On its own it prints every
field, whether the badge is provisioned, and the state of the device key. --serial and
--product print a single field, and --store-path prints the Nix store path of the PCB
design that the badge was built from, which is also burned into its eFuses. With a field
flag it exits non-zero if that field isn’t fused.
sudo nix-badge mmio read ADDR and sudo nix-badge mmio write ADDR VALUE read and write
32-bit physical registers. Be careful with it: reading a block that isn’t clocked can hang
the whole SoC. The kernel never lets it at RAM, and lets it at a register a driver has claimed
(see /proc/iomem) only when the badge was booted with iomem=relaxed added to the kernel
command line by hand.
nix-badge fix-selftest and nix-badge nix-selftest smoke-test the two Nix evaluators
(see Evaluators). The upstream Nix one is only built on ARM.
Commands the services run
| Command | Service | What it does |
|---|---|---|
nix-badge bling run | nix-badge-bling | Drives the LED ring |
nix-badge oled | nix-badge-oled | Runs the OLED screens and reads BUTTON |
nix-badge bootswap | nix-badge-bootswap | Switches cores when BOOT is held for 3 seconds (see Switching CPU cores) |
Options
These are the NixOS options that BadgeOS declares, generated from the modules in the repository every time this site is built. Each entry shows the option’s type, its default, an example if there is one, and the file that declares it.
To find an option by name or by what it does, use the options search. The search button at the top of every page (or the S key) searches the whole site, including these pages.
Each group is one page, with all the options under one name, such as badge.bling.
The same data is also available as options.json, in the same format as
the NixOS manual’s options.json, for use with other tools.
Options search
Every word you type must appear in the option’s name or description; matches in the name come first. The query is kept in the address bar, so you can share a search by its link.
badge.bling
Declared in BadgeOS/modules/sg2k/bling.nix.
badge.bling.enable
Whether to enable the badge WS2812 LED ring.
Type: boolean
Default:
config.hardware.sg2k.ledRing.enable
Example:
true
Declared by:
badge.bling.backend
The evaluator for evalPattern: “fix” (embedded) or “nix” (the Nix C API,
aarch64 only; elsewhere it falls back to fix).
Type: one of “fix”, “nix”
Default:
"fix"
Declared by:
badge.bling.bits
SPI bits sent for each WS2812 bit: 8 (0 -> 10000000, 1 -> 11111100), 4 (1000, 1110) or 3 (100, 110; flips bits at random on this badge’s LEDs).
Type: one of 3, 4, 8
Default:
8
Declared by:
badge.bling.blob
A baked “BLED” RGB-frame blob to play on the ring (see nix-badge-bling-content’s
leds.nix). With neither this nor evalPattern, the ring shows a dim blue fill.
Type: null or absolute path
Default:
null
Declared by:
badge.bling.brightness
Global brightness, applied by scaling the colour channels.
Type: integer between 0 and 255 (both inclusive)
Default:
64
Declared by:
badge.bling.count
Number of WS2812 LEDs on the ring.
Type: positive integer, meaning >0
Declared by:
badge.bling.csHigh
Ask spidev for SPI_CS_HIGH. Keep this true: the LED ring only takes data while chip select is high (LED_DIN = CS AND SDO). The device tree’s GPIO chip select already sets that polarity, so this option is only for overriding it.
Type: boolean
Default:
true
Declared by:
badge.bling.device
spidev node for the SPI3 controller.
Type: string
Default:
"/dev/spidev3.0"
Declared by:
badge.bling.evalPattern
A pure-Nix LED pattern, scope: { bitmap = [ 0xRRGGBB ... ]; nextMs; },
evaluated every frame. Takes precedence over blob.
Type: null or absolute path
Default:
null
Declared by:
badge.bling.fps
Animation frames per second.
Type: integer between 1 and 200 (both inclusive)
Default:
30
Declared by:
badge.bling.speedHz
SPI clock in Hz; with bits it sets the LED bit time. The driver rounds it
to an even divisor of ssi_clk, and the service logs the timing it got. The
badge’s XL-1615/XL-2020 LEDs want a T1H of 0.9 to 1.0 us.
Type: positive integer, meaning >0
Default:
6400000
Declared by:
badge.cache
Declared in BadgeOS/modules/sg2k/cache.nix.
badge.cache.enable
Whether to enable the badge’s pull-through binary cache.
Type: boolean
Default:
config.badge.ipxe.enable
Example:
true
Declared by:
badge.cache.upstreams
The binary caches a miss is pulled from, tried in order.
Type: list of string
Default:
[
  "https://cache.nixos.lv"
  "https://cache.nixos.org"
]
Declared by:
badge.desktop
Declared in BadgeOS/modules/sg2k/desktop.nix.
badge.desktop.enable
Whether to enable desktop boot specialisation.
Type: boolean
Default:
config.hardware.sg2k.hdmi.enable
Example:
true
Declared by:
badge.graphics
Declared in BadgeOS/modules/sg2k/graphics.nix, BadgeOS/modules/sg2k/games.nix.
badge.graphics.enable
Whether to enable Sway on DRM/KMS, software-rendered.
Type: boolean
Default:
false
Example:
true
Declared by:
badge.graphics.autostart
Commands the sway config starts (exec), in order.
Type: list of string
Default:
[ ]
Example:
[
  "/run/current-system/sw/bin/badge-demo"
]
Declared by:
badge.graphics.autostartDemo
Launch badge-demo from the sway config (and install it); ESC in the prod quits back to sway.
Type: boolean
Default:
false
Declared by:
badge.graphics.autostartQuake
Launch ioquake3 from the sway config.
Type: boolean
Default:
false
Declared by:
badge.graphics.demo
Install the “Nix Fixes This” demoscene prod (badge-demo).
Type: boolean
Default:
false
Declared by:
badge.graphics.outputMode
The mode sway sets on the HDMI output; both drive the same 1280x720p60 line. “1280x720”: the DISP video layer scans the compositor’s RGB888 buffer 1:1. “640x360”: the DISP GOP doubles an XRGB8888 buffer, for a quarter of the pixels to render and a third of the scanout bandwidth.
Type: one of “1280x720”, “640x360”
Default:
"1280x720"
Declared by:
badge.graphics.quake
Install ioquake3 and the Quake III demo data.
Type: boolean
Default:
true
Declared by:
badge.graphics.quakeHeight
ioquake3 render height (r_customheight). See quakeWidth.
Type: signed integer
Default:
360
Declared by:
badge.graphics.quakeHunkMiB
ioquake3’s up-front hunk allocation (com_hunkMegs), in MiB. Upstream defaults to 128; this board has 351 MB of RAM in total.
Type: signed integer
Default:
64
Declared by:
badge.graphics.quakeWidth
ioquake3 render width (r_customwidth). At 640x360 SDL switches the output to its GOP-doubled 640x360 mode, three times as fast as 1280x720.
Type: signed integer
Default:
640
Declared by:
badge.ipxe
Declared in BadgeOS/modules/sg2k/ipxe.nix.
badge.ipxe.enable
Whether to enable netbooting the Nix Vegas installer from the badge.
Type: boolean
Default:
config.badge.router.enable
Example:
true
Declared by:
badge.ipxe.badapple
The iPXE script the menu offers to play before booting.
Type: package
Default:
pkgs.nix-badge-netboot-badapple
Declared by:
badge.ipxe.banner
The text iPXE shows before the menu.
Type: absolute path
Default:
../installer/motd.txt
Declared by:
badge.ipxe.manual
The site nginx serves at /.
Type: package
Default: this manual, built to be served at /
Declared by:
badge.ipxe.netboot
What is netbooted: a directory with bzImage, initrd and netboot.ipxe, which loads them by relative path, and the x86_64 iPXE binaries ipxe.efi and undionly.kpxe.
Type: package
Default: the Nix Vegas installer, built for x86_64-linux
Declared by:
badge.lan
Declared in BadgeOS/modules/sg2k/lan.nix.
badge.lan.enable
Give the badge its address on its own network and serve what is on it: the router’s LAN, or with the router off the computer on the USB port. The router needs it on.
Type: boolean
Default:
true
Declared by:
badge.lan.address
The badge’s address on its network.
Type: string
Default:
"10.55.0.1"
Declared by:
badge.lan.dhcp
Serve DHCP on the badge’s network.
Type: boolean
Default:
true
Declared by:
badge.lan.dns
Serve DNS on the badge’s network.
Type: boolean
Default:
true
Declared by:
badge.lan.interface
The badge’s network: the bridge the router makes, or the USB link.
Type: string
Default:
if config.badge.router.enable then "lan0" else config.badge.router.interfaces.usb
Declared by:
badge.lan.offerGateway
On the USB link, hand the badge out as the host’s default route (the DHCP router option). Off by default: a workstation applying it would route through the badge, which does not NAT there. The router offers itself while its uplink is up.
Type: boolean
Default:
false
Declared by:
badge.lan.poolEnd
The last address DHCP hands out.
Type: string
Default:
"10.55.0.200"
Declared by:
badge.lan.poolStart
The first address DHCP hands out.
Type: string
Default:
"10.55.0.100"
Declared by:
badge.lan.prefixLength
The prefix length of the badge’s network.
Type: signed integer
Default:
24
Declared by:
badge.oled
Declared in BadgeOS/modules/sg2k/oled.nix.
badge.oled.enable
Run the oled engine on the optional SAO OLED. Without it the WS2812 ring still animates.
Type: boolean
Default:
config.hardware.sg2k.oled.enable
Declared by:
badge.oled.backend
The evaluator for the eval screens: “fix” (embedded) or “nix” (the Nix C API, aarch64 only; elsewhere it falls back to fix). A >5 s button hold flips it and saves the choice to /etc/nix-badge/oled.backend, which wins over this.
Type: one of “fix”, “nix”
Default:
"fix"
Declared by:
badge.oled.blingDir
Directory of pure-Nix LED patterns (*.nix, in name order) that a short press cycles through, by writing the next one into leds.conf.
Type: string
Default:
"/etc/nix-badge/bling.d"
Declared by:
badge.oled.button
Device-tree gpio-line-name of the button: a short press cycles the LED pattern, a long one the OLED screen. Without such a line the engine runs on SIGUSR1/2 alone. btn-boot-n belongs to bootswap.
Type: string
Default:
"user-btn"
Declared by:
badge.oled.controller
Which controller drives the panel. “auto” detects automatically.
Type: one of “auto”, “ssd1306”, “sh1106”
Default:
"auto"
Declared by:
badge.oled.dynamicNix
Link the engine’s Nix C API dynamically: seconds instead of a ~15-minute static link, for a bigger closure.
Type: boolean
Default:
true
Declared by:
badge.oled.ethInterface
The wired interface whose IPv4 address the net screen shows (passed as
--eth-iface).
Type: string
Default:
"eth0"
Example:
"end0"
Declared by:
badge.oled.evalDir
A directory of *.nix screens, read at run time in name order. They may
import <nix-badge/lib/...> (nix-badge=/etc/nix-badge).
Type: null or string
Default:
null
Declared by:
badge.oled.evalScreens
Pure-Nix OLED screens, scope: { bitmap = [ <int> ... ]; nextMs; } (4 page
bytes per int, little-endian), compiled into one shared fix Engine. A long
press or SIGUSR2 cycles them; a screen that fails to compile is skipped.
Type: list of absolute path
Default:
[ ]
Example:
[
  "${pkgs.bling-badapple-live}/badapple-live.nix"
]
Declared by:
badge.oled.gcBudgetMb
The fix Engine’s GC collection line, in MiB: the heap-reserved size at which an allocation triggers a collection.
Type: positive integer, meaning >0
Default:
32
Declared by:
badge.oled.height
OLED height in pixels (32 or 64 rows).
Type: one of 32, 64
Default:
32
Declared by:
badge.oled.width
OLED width in pixels (128 for the SSD1306).
Type: positive integer, meaning >0
Default:
128
Declared by:
badge.oled.wlanInterface
The wireless interface whose IPv4 address the net screen shows (passed
as --wlan-iface).
Type: string
Default:
"wlan0"
Example:
"wlp1s0"
Declared by:
badge.router
Declared in BadgeOS/modules/sg2k/router.nix.
badge.router.enable
Whether to enable the badge as a router for whatever is on its wired ports.
Type: boolean
Default:
false
Example:
true
Declared by:
badge.router.interfaces.ethernet
The Ethernet interface. For tests and other boards.
Type: string
Default:
"eth0"
Declared by:
badge.router.interfaces.usb
The USB network interface. For tests and other boards.
Type: string
Default:
"usb0"
Declared by:
badge.router.interfaces.wifi
The WiFi interface. For tests and other boards.
Type: string
Default:
"wlan0"
Declared by:
badge.router.upstream
The uplink: the port the badge takes its default route from and NATs out of. The other wired ports are bridged as the badge’s own network, lan0.
Type: one of “wifi”, “ethernet”, “usb”
Default:
"wifi"
Declared by:
badge.video
Declared in BadgeOS/modules/sg2k/video.nix.
badge.video.enable
Whether to enable the video boot specialisation: H.264 clips on HDMI via the vendor VDEC/VO
path, advanced with the USER button.
Type: boolean
Default:
config.hardware.sg2k.hdmi.enable
Example:
true
Declared by:
badge.video.directory
Folder scanned for H.264 Annex-B elementary streams (*.264 / *.h264), played in sorted order. Convert with, e.g.: ffmpeg -i in.mp4 -an -c:v libx264 -bsf:v h264_mp4toannexb -f h264 out.264
Type: string
Default:
"/var/lib/nix-badge-video"
Declared by:
badge.video.fps
Rate, in frames/sec, at which clips are fed to the decoder.
Type: signed integer
Default:
60
Declared by:
badge.video.longPressMs
USER-button hold, in milliseconds, at or above which a press counts as “previous” instead of “next”.
Type: signed integer
Default:
600
Declared by:
hardware.sg2k
Declared in BadgeOS/modules/sg2k/options.nix, BadgeOS/modules/sg2k/firmware.nix.
hardware.sg2k.enable
Whether to enable SG200x board support.
Type: boolean
Default:
false
Example:
true
Declared by:
hardware.sg2k.board
The board this system runs on.
Type: one of “nix-badge”, “licheerv-nano”
Default:
"nix-badge"
Declared by:
hardware.sg2k.cores
The cores the board can boot.
Type: list of (one of “arm”, “riscv”)
Default:
[ ]
Declared by:
hardware.sg2k.fitKeyCert
PEM certificate of the sg1-image key, which signs the generation image and which the secure U-Boot trusts. Required with secureBoot. When set it is also the RAUC keyring.
Type: null or absolute path
Default:
null
Declared by:
hardware.sg2k.secureBoot
Boot through the verified-boot chain: the secure U-Boot in the fip (signed FITs only, trusting hardware.sg2k.fitKeyCert) and a generation image and slot vbmeta images signed with the sg1-image key. Implies hardware.sg2k.firmware.secureBoot. The signing needs the autopen daemon socket at build time.
Type: boolean
Default:
false
Declared by:
hardware.sg2k.soc
The SoC on the board.
Type: one of “sg2000”, “sg2002”
Declared by:
hardware.sg2k.coreSelect
Declared in BadgeOS/modules/sg2k/options.nix.
hardware.sg2k.coreSelect.enable
Whether to enable switching the boot core from Linux.
Type: boolean
Default:
false
Example:
true
Declared by:
hardware.sg2k.display
Declared in BadgeOS/modules/sg2k/display.nix.
hardware.sg2k.display.enable
Whether to enable the forward-ported Sophgo VIP display stack.
Type: boolean
Default:
config.hardware.sg2k.hdmi.enable
Example:
true
Declared by:
hardware.sg2k.display.autoLoad
Bring the VIP stack up at boot. Needs clk_ignore_unused on the kernel command line (kernel.nix): any MMIO to the VIP region after its clock is gated deadlocks the AXI interconnect.
Type: boolean
Default:
true
Declared by:
hardware.sg2k.display.autoLoadCodec
Include the codec island in the boot-time load. Requires autoLoad.
Type: boolean
Default:
false
Declared by:
hardware.sg2k.display.autoLoadDrm
Load the KMS front end (soph_drm) at boot too. Requires autoLoad.
Type: boolean
Default:
false
Declared by:
hardware.sg2k.display.drmDevice
Pin wlroots to one DRM device (WLR_DRM_DEVICES); empty lets it choose. The Sharp memory panel is a DRM device too, and card numbering is not stable.
Type: string
Default:
""
Example:
"/dev/dri/card1"
Declared by:
hardware.sg2k.dtb
Declared in BadgeOS/modules/sg2k/options.nix.
hardware.sg2k.dtb.name
The board DTB, relative to the kernel’s dtbs directory.
Type: string
Declared by:
hardware.sg2k.emmc
Declared in BadgeOS/modules/sg2k/options.nix.
hardware.sg2k.emmc.enable
Whether to enable the on-board eMMC.
Type: boolean
Default:
false
Example:
true
Declared by:
hardware.sg2k.ethernet
Declared in BadgeOS/modules/sg2k/options.nix.
hardware.sg2k.ethernet.enable
Whether to enable the on-board Ethernet.
Type: boolean
Default:
false
Example:
true
Declared by:
hardware.sg2k.externalStorage
Declared in BadgeOS/modules/sg2k/options.nix.
hardware.sg2k.externalStorage.enable
Data cards: booted from the eMMC with an SD card whose GPT has a partition named EXT_USERDATA (ext4), the card takes every write and the eMMC’s USERDATA is read through it, read-only. A FAT32 partition named BOOT on the card lets the badge be deployed to with the card in.
Type: boolean
Default:
config.hardware.sg2k.emmc.enable
Declared by:
hardware.sg2k.firmware
Declared in BadgeOS/modules/sg2k/firmware.nix.
hardware.sg2k.firmware.encryptedBoot
Additionally AES-encrypt the images in the active fip (implies secureBoot), for a badge fused to SCS=02.
Type: boolean
Default:
false
Declared by:
hardware.sg2k.firmware.fipPath
Absolute path, on the badge’s FAT boot partition, that a deploy writes the active polyglot fip to.
The default is the file the BootROM itself loads, which is what an ordinary badge wants: every deploy refreshes the firmware in place.
Set it to a different file on a sophgone exploit target. There /boot/fip.bin holds the grafted fip.
Type: string
Default:
"/boot/fip.bin"
Example:
"/boot/sophg.1"
Declared by:
hardware.sg2k.firmware.secureBoot
Install the TPM-signed polyglot as the active fip, for a badge whose SCS fuses
are burned (its mask ROM verifies the RSA chain, and an unsigned fip halts at
E:verify root (-14)). Also drops the unsigned /boot/fip-<core>.bin recovery
blob, which cannot boot there. The signing needs the autopen daemon socket at
build time.
Type: boolean
Default:
config.hardware.sg2k.secureBoot
Declared by:
hardware.sg2k.hdmi
Declared in BadgeOS/modules/sg2k/options.nix.
hardware.sg2k.hdmi.enable
Whether to enable HDMI output through the LT8912B bridge.
Type: boolean
Default:
false
Example:
true
Declared by:
hardware.sg2k.hdmi.audio
HDMI mode with I2S audio on the LT8912B (its hdmi_audio parameter).
Type: boolean
Default:
false
Declared by:
hardware.sg2k.hdmi.hactiveOffset
Pixels added to the LT8912B bridge’s programmed active width (the lontium_lt8912b hactive_offset parameter, from a kernel.nix patch). Some DSI sources shear ~1 px/row at the exact width; 0 is upstream behaviour. Tunable live at /sys/module/lontium_lt8912b/parameters/hactive_offset.
Type: signed integer
Default:
0
Declared by:
hardware.sg2k.ledRing
Declared in BadgeOS/modules/sg2k/options.nix.
hardware.sg2k.ledRing.enable
Whether to enable the WS2812 LED ring on SPI3.
Type: boolean
Default:
false
Example:
true
Declared by:
hardware.sg2k.memory
Declared in BadgeOS/modules/sg2k/options.nix.
hardware.sg2k.memory.cmaMiB
Size of the CMA reservation (the cma= kernel parameter), in MiB. gmac0’s descriptor rings and the VIP video-buffer pool (one 11.25 MB request) share it.
Type: signed integer
Default:
16
Declared by:
hardware.sg2k.memory.sizeMiB
DRAM size in MiB.
Type: positive integer, meaning >0
Declared by:
hardware.sg2k.oled
Declared in BadgeOS/modules/sg2k/options.nix.
hardware.sg2k.oled.enable
Whether to enable the I2C OLED.
Type: boolean
Default:
false
Example:
true
Declared by:
hardware.sg2k.rauc
Declared in BadgeOS/modules/sg2k/rauc.nix.
hardware.sg2k.rauc.compatible
RAUC’s compatible string. The system refuses bundles built for another one.
Type: string
Default:
"sg2k/${config.hardware.sg2k.board}"
Declared by:
hardware.sg2k.rauc.trustDevKeyring
Trust the development RAUC key when hardware.sg2k.fitKeyCert is null. Its private half is committed to the repository, so anyone can sign bundles this system accepts. For test systems only.
Type: boolean
Default:
false
Declared by:
hardware.sg2k.sharpPanel
Declared in BadgeOS/modules/sg2k/options.nix.
hardware.sg2k.sharpPanel.enable
Whether to enable the Sharp memory panel as the system console.
Type: boolean
Default:
false
Example:
true
Declared by:
hardware.sg2k.usb
Declared in BadgeOS/modules/sg2k/usb-gadget.nix, BadgeOS/modules/sg2k/usb-role.nix.
hardware.sg2k.usb.gadget.enable
Enable the USB CDC-NCM gadget (badge-as-network-device over USB).
Type: boolean
Default:
true
Declared by:
hardware.sg2k.usb.gadget.manufacturer
USB iManufacturer string descriptor.
Type: string
Default:
"Dagian Industries"
Declared by:
hardware.sg2k.usb.gadget.product
USB iProduct string descriptor. May carry a store path or build id (up to 126 UTF-16 units).
Type: string
Default:
"SG200x board (NCM)"
Declared by:
hardware.sg2k.usb.gadget.serialFromEfuse
When serialNumber is empty, get the serial from the eFuses.
Type: boolean
Default:
true
Declared by:
hardware.sg2k.usb.gadget.serialNumber
USB iSerialNumber. Empty means derive it at runtime.
Type: string
Default:
""
Declared by:
hardware.sg2k.usb.role
The USB-C port’s role. As a device the badge is a USB network adapter (the gadget); as a host it powers the port and a keyboard, mouse or hub enumerates. The desktop profile is a host.
As a host the badge is not reachable over usb0; deploy over Ethernet or WiFi.
Type: one of “host”, “device”
Default:
"device"
Declared by:
hardware.sg2k.wifi
Declared in BadgeOS/modules/sg2k/options.nix.
hardware.sg2k.wifi.enable
Whether to enable the on-board AIC8800 WiFi.
Type: boolean
Default:
false
Example:
true
Declared by:
hardware.sg2k.wifi.bluetooth
How the WiFi chip’s Bluetooth is attached, if at all.
Type: one of “none”, “sdio”, “uart”
Default:
"none"
Declared by:
hardware.sg2k.wifi.firmware
The WiFi chip’s firmware set: a directory of the vendor tree’s SDIO firmware.
Type: string
Default:
"aic8800D80"
Example:
"aic8800"
Declared by: